github.com/corneliusmunz/legoino @1.1.0
Chat with this repoBrowse by type
What it actually does AI analysis from the code graph — generated when you open this
README




Legoino
Disclaimer: LEGO® is a trademark of the LEGO Group of companies which does not sponsor, authorize or endorse this project.
Legoino is an Arduino Library for controlling all kinds of LEGO Powered UP devices. From the two port hub, move hub (e.g. boost), duplo train hub, technic hub to several devices like distance and color sensor, tilt sensor, train motor, remote control, speedometer, etc. you can control almost everthing with that library and your Arduino sketch.
It is also possible to use the "old" Power Function IR Modules and control them via an IR LED connected to a PIN of your ESP32 device. With the Hub emulation function you can even control an "old" Power Function Light or Motor with the Powered Up App.
Arduino Hardware and dependent libraries
The library is implemented for ESP32 Boards and does use the ESP32 NimBLE-Arduino Library as dependency. This should be installed via the Arduino library manager before using legoino.
Quickstart
You can find a step by step instruction to your first Legoino project on the following link: Quickstart Tutorial
Breaking Changes
Starting from version 1.0.0 many functions have been renamed and the global variables have been removed and are replaced by callback functions. In former versions the reading of sensor values of single or multiple sensors and even reading sensors from different hubs, was not working properly. Due to the change to the NimBLE-Arduino library the callbacks could now be part of member functions and has not to be globally defined.
So have a look on the changes and adapt your sketches to the new callbacks. You can find a migration guide here: Migration Guide
If you have questions regarding the migration of your sketches, don't hesitate to use the chat.
Usage Videos
In the following videos you can see wiht short examples what you can do with the library.
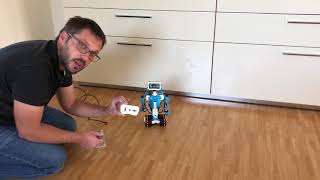
Remote control your boost model example (just click the image to see the video)
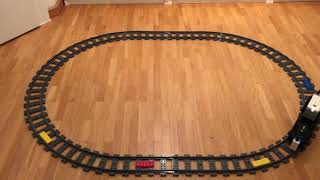
Simple Train example (just click the image to see the video)
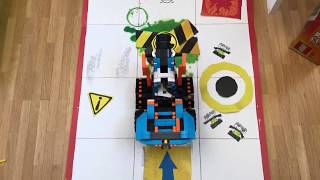
Simple Boost movement example (just click the image to see the video)
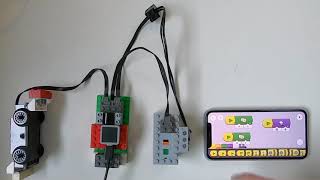
Simple Hub Emulation example as Bridge from PoweredUp to PowerFunction. With this you have an upgrade of your PowerFunction system and it works like a two Port PoweredUp hub.
Examples
All the included examples are a great source to find a solution or pattern for your problem you want to solve with your Arduino sketch.
You can find different Examples in the "examples" folder. You can select the examples in your Arduino IDE via the Menu "File->Examples". Just have a look on the videos to see the examples running :smiley: * Boost.ino: Example who uses the basic boost moovements (feasable for M.T.R.4 or Vernie model). http://www.youtube.com/watch?v=VgWObhyUmi0 * ColorSensor.ino: Example which reads in the color Sensor value (attached to an abritary port) and uses the detected color to set the Hub LED accordingly. https://youtu.be/_xCd9Owy1nk * MoveHubDeviceInfo.ino: Example which displays the various device infos (firmware version, battery level, rssi, hardwar version, tilt) in the serial monitor * DistanceSensor.ino: Example which reads in the input of the distance sencor and set the Hub LED color dependent on the distance. https://youtu.be/TOAQtGGjZ6c * RotationSensor.ino: Example which reads in the input of the Tacho motor angle to set the Hub LED dependent on the angle to the scale of rainbow colors. https://youtu.be/c3DHpX55uN0 * TrainHub.ino: Example for a PowererdUp Hub to set the speed of a train model. http://www.youtube.com/watch?v=o1hgZQz3go4 * TrainColor.ino: Example of PoweredUp Hub combined with color sensor to control the speed of the train dependent on the detected color. https://youtu.be/GZ0fqe3-Bhw * HubEmulation.ino: Example of an emulated PoweredUp Hub two port hub (train hub) which could receive signals from the PoweredUp app and will send out the signals as IR commands to a Powerfunction remote receiver. https://www.youtube.com/watch?v=RTNexxT4-yQ * PoweredUpRemoteAutoDetection.ino: Example of connection of PoweredUp and PoweredUpRemote where the device type is fetched automatically and the order in which you switched on the hubs is no longer relevant. * ControlPlusHub.ino: Example of connection of ControlPlusHub (TechnicHub) where a Tacho Motor on Port D is controlled. * Mario.ino Example of connection to a Mario Hub to read in sensor notifications about the Barcode/Tag sensor, Color sensor, Pants sensor and Gesture sensor.
Setup and Usage
Just install the Library via the Arduino Library Manager.
First example
Just have a look on the Quickstart Tutorial.
Connection procedure
To setup a connection to your hub, the Hub instance has to be initialized. This will trigger a Scan procedure to look if a Lego Hub is active. If the library found an active hub, it will read out his data (Hub Address, Hub Name, etc.) and changes the state to myHub.isConnecting() == true
Now you are ready to connect to the hub with the command myHub.connectHub();
If the library changes the state to myHub.isConnected() == true you are ready to go and do some cool stuff :grin:
In the setup part of your Arduino sketch, just initialize your Hub
myHub.init();
In the main loop just add the following connection flow
  if (myHub.isConnecting()) {
    myHub.connectHub();
    if (myHub.isConnected()) {
      Serial.println("We are now connected to the HUB");
    } else {
      Serial.println("We have failed to connect to the HUB");
    }
  }
Motor Commands
There are different types of motors in the LEGO ecosystem. The Basic Motor (e.g. Train Hub), The Tacho motor and the absolute motor. The Prefixes Basic, Tacho and Absolute tells you which command fits for which type of motor. The Tacho Motor commands can also be used for the Absolute motor.
  void stopBasicMotor(byte port);
  void setBasicMotorSpeed(byte port, int speed);
  ````

```c++
  void setAccelerationProfile(byte port, int16_t time);
  void setDecelerationProfile(byte port, int16_t time);
  void stopTachoMotor(byte port);
  void setTachoMotorSpeed(byte port, int speed, byte maxPower = 100, BrakingStyle brakingStyle = BrakingStyle::BRAKE);
  void setTachoMotorSpeedForTime(byte port, int speed, int16_t time, byte maxPower = 100, BrakingStyle brakingStyle = BrakingStyle::BRAKE);
  void setTachoMotorSpeedForDegrees(byte port, int speed, int32_t degrees, byte maxPower = 100, BrakingStyle brakingStyle = BrakingStyle::BRAKE);
  void setTachoMotorSpeedsForDegrees(int speedLeft, int speedRight, int32_t degrees, byte maxPower = 100, BrakingStyle brakingStyle = BrakingStyle::BRAKE);
  void setAbsoluteMotorPosition(byte port, int speed, int32_t position, byte maxPower = 100, BrakingStyle brakingStyle = BrakingStyle::BRAKE);
  void setAbsoluteMotorEncoderPosition(byte port, int32_t position);
  ```


## Hub Commands

For some use cases it is needed to get the hub address (check a specific hub), the hub type (check a hub type) or the hub name. It is also possible to change the hub name and shutdown the hub.
```c++
  NimBLEAddress getHubAddress();
  HubType getHubType();
  std::string getHubName();
  void setHubName(char name[]);
  void shutDownHub();
  ```

## LED Commands

To control the Hub LEDs, you can use predefined color Variables in the `Color` enum, RGB values or HSV values with the following commands:

```c++
  void setLedColor(Color color);
  void setLedRGBColor(char red, char green, char blue);
  void setLedHSVColor(int hue, double saturation, double value);
Sensor and hub proptery handling
To get notified about sensor value updates (Button, Hub properties like Voltag, Rssi, Tacho motor encoder, Speedometer, Colorsensor, Distancesensor, ...), callback functions are used. After you read the following section you can also have a look into the examples which are included in the library. They are always a good source to find solutions/patterns for problems you want to solve.
Callbacks
To use the callbacks you have to do the following steps. Part of the callback ist the reference of the hub instance. So you can use the hub instance which have triggerd the callback function to control attached motors or devices.
Write callback function for port devices
To read in changes of devices which are attached to a Port (build in or external), you have to write a function with the following signature:
typedef void (*PortValueChangeCallback)(void *hub, byte portNumber, DeviceType deviceType, uint8_t *pData);
````

Example:
```c++
// callback function to handle updates of sensor values
void tachoMotorCallback(void *hub, byte portNumber, DeviceType deviceType, uint8_t *pData)
{
  Lpf2Hub *myHub = (Lpf2Hub *)hub;

  Serial.print("sensorMessage callback for port: ");
  Serial.println(portNumber, DEC);
  if (deviceType == DeviceType::MEDIUM_LINEAR_MOTOR)
  {
    int rotation = myHub->parseTachoMotor(pData);
    Serial.print("Rotation: ");
    Serial.print(rotation, DEC);
    Serial.println(" [degrees]");
    myHub->setLedHSVColor(abs(rotation), 1.0, 1.0);
  }
}
This function will be called if an value update appears and you can react on the new value. In this case the LED color changes depentend on the motor rotation.
Write callback function for hub properties
To read in changes of hub properties (button, RSSI, battery level, ...), you have to write a function with the following signature:
typedef void (*HubPropertyChangeCallback)(void *hub, HubPropertyReference hubProperty, uint8_t *pData);
Example:
// callback function to handle updates of hub properties
void hubPropertyChangeCallback(void *hub, HubPropertyReference hubProperty, uint8_t *pData)
{
  Lpf2Hub *myHub = (Lpf2Hub *)hub;
  Serial.print("HubAddress: ");
  Serial.println(myHub->getHubAddress().toString().c_str());

  Serial.print("HubProperty: ");
  Serial.println((byte)hubProperty, HEX);

  if (hubProperty == HubPropertyReference::RSSI)
  {
    Serial.print("RSSI: ");
    Serial.println(myHub->parseRssi(pData), DEC);
    return;
  }

  if (hubProperty == HubPropertyReference::BATTERY_VOLTAGE)
  {
    Serial.print("BatteryLevel: ");
    Serial.println(myHub->parseBatteryLevel(pData), DEC);
    return;
  }

  if (hubProperty == HubPropertyReference::BUTTON)
  {
    Serial.print("Button: ");
    Serial.println((byte)myHub->parseHubButton(pData), HEX);
    return;
  }
}
This function will be called if an value update appears and you can react on the new value. In this case it will check the hub button state (pressed, released) or the RSSI value has changed or the battery level has changed.
Activate notifications
To get calls to your callback functions you have to register or activate it for the properties you want to get informed about updates. This has to be done after the hub is connected (not before). If you want to register updates for several properties/sensors, just add a short delay (50-100ms) after each register/activate call.
For Port related updates you have to use the function
void activatePortDevice(byte portNumber, byte deviceType, PortValueChangeCallback portValueChangeCallback = nullptr);
Example
// get notified for value updates of the device which is connected on port D
myMoveHub.activatePortDevice(portD, tachoMotorCallback);
delay(50);
myMoveHub.activateHubPropertyUpdate(HubPropertyReference::BUTTON, buttonCallback);
For Hub property related updates you have to use the function
void activateHubPropertyUpdate(HubPropertyReference hubProperty, HubPropertyChangeCallback hubPropertyChangeCallback = nullptr);
Example
// get notified for value updates of the build in Button of the hub
myMoveHub.activateHubPropertyUpdate(HubPropertyReference::BUTTON, buttonCallback);
You can also check if an expected device is really connected to a port by using the new introduced function checkPortForDevicelike in the following example
Serial.print("check ports... if needed sensor is already connected: ");
byte portForDevice = myHub.getPortForDeviceType((byte)DeviceType::COLOR_DISTANCE_SENSOR);
Serial.println(portForDevice, DEC);
// check for expected port number where the device should be connected
if (portForDevice == 1)
{
    Serial.println("activatePortDevice");
    myHub.activatePortDevice(portB, colorDistanceSensorCallback);
}
Hub emulation
The Hub emu
Core symbols most depended-on inside this repo
Shape
Languages
Modules by API surface
For agents
$ claude mcp add legoino \
  -- python -m otcore.mcp_server <graph>