github.com/omnigent-ai/omnigent @v0.4.0
README
 Omnigent
The open-source meta-harness for all your AI agents.
Omnigent is an open-source meta-harness that gives you a common orchestration layer over Claude Code, Codex, Cursor, OpenCode, Hermes, Pi, and the agents you write yourself: swap or combine harnesses without rewriting, enforce policies and sandboxing, and collaborate in real time from any device — terminal, browser, phone, or the native desktop app.

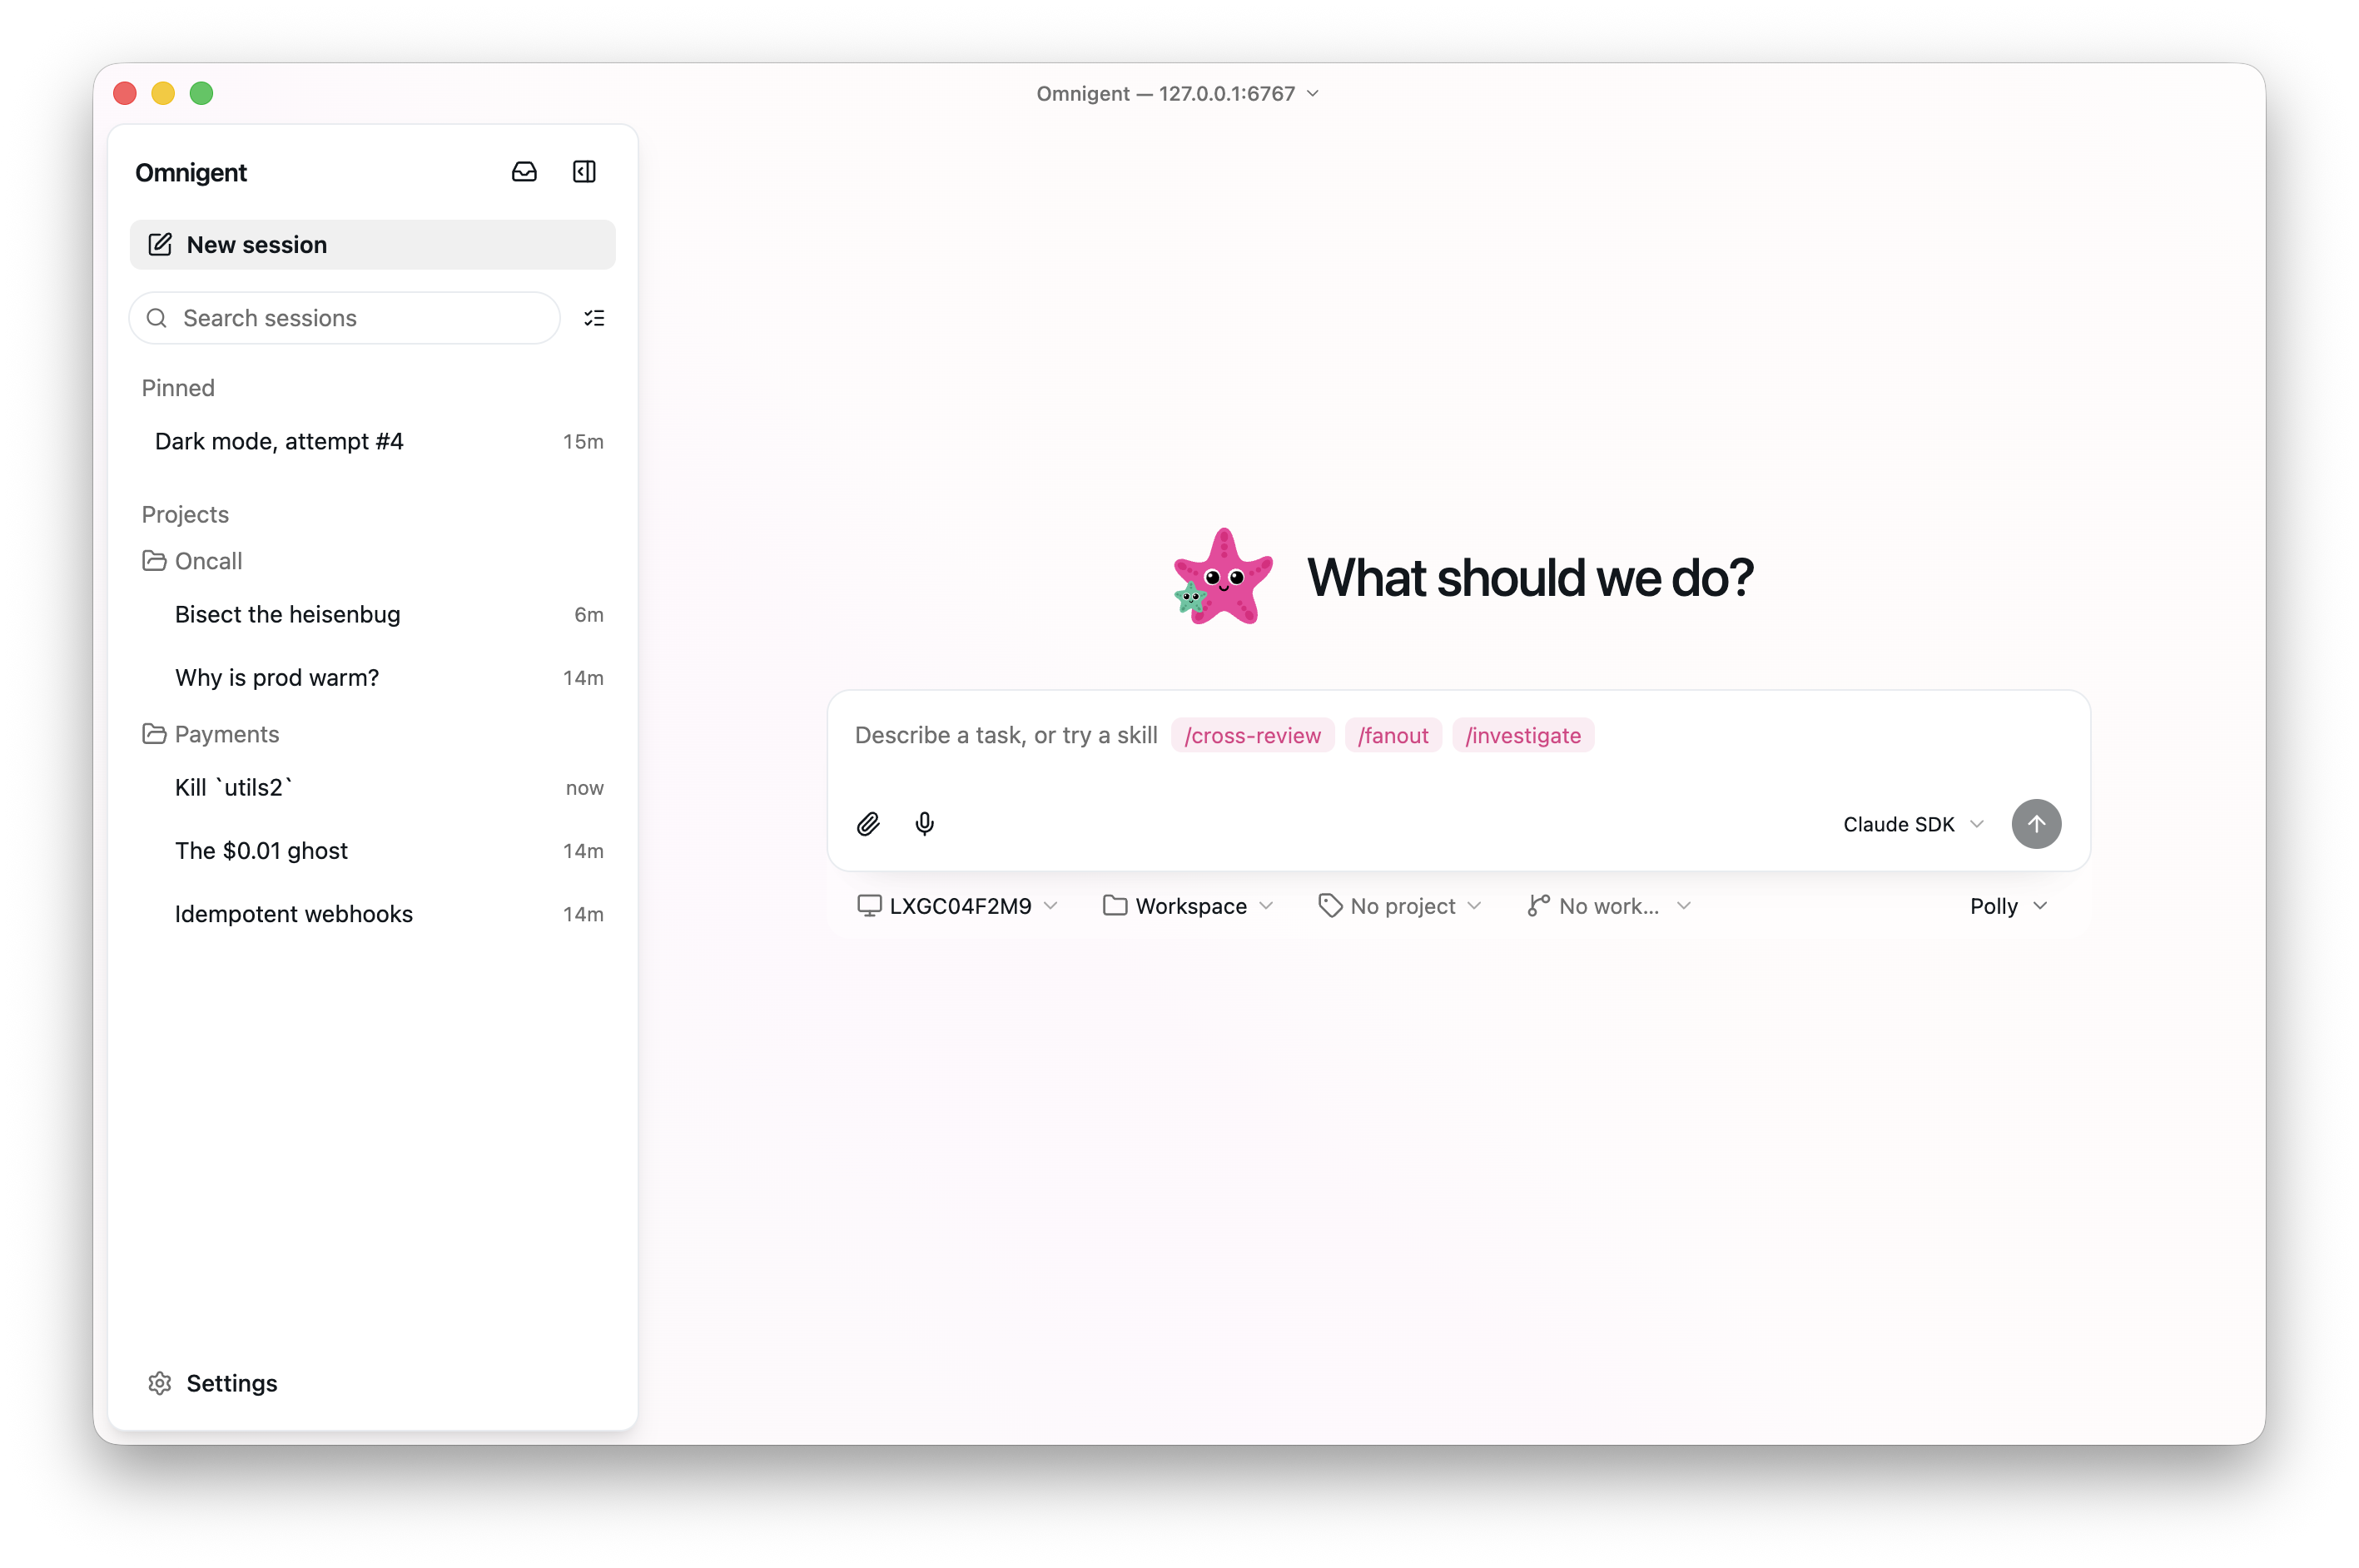
![]()
![]()
omnigent.ai · ⬇️ Download the macOS desktop app
Why Omnigent?
Omnigent lets you:
-
📱 Work with agents from any device, including your phone. Sessions follow you: start in your terminal, continue in the browser, pick it up on your phone. Messages, sub-agents, terminals, and files stay in sync.
-
🤖 Supervise multiple agents. Mix Claude Code, Codex, Cursor, OpenCode, Hermes, Pi, and custom agents (defined in YAML) together in the same session. Ask one agent to review another's work, or split a task across agents that are each good at different things.
-
🔌 Use any model. A first-party API key, a Claude/ChatGPT subscription, or any compatible gateway. All first-class.
-
🤝 Collaborate. Share a session so teammates can chat with your agent and watch it work live, co-drive it on your machine, or fork the conversation to continue on their own.
-
☁️ Run agents in cloud sandboxes. No laptop required: run sessions in disposable Modal, Daytona, Islo, E2B, CoreWeave, Kubernetes, OpenShell, Boxlite, or Databricks sandboxes, launched from the CLI or provisioned by the server per session (managed hosts).
-
🛡️ Govern your agents. Create policies to pause for your approval before risky actions, cap spend, or limit which tools an agent reaches. They apply to the whole server, one agent, or a single chat.
Quick start
1. Install
One command installs Omnigent and everything it needs:
curl -fsSL https://raw.githubusercontent.com/omnigent-ai/omnigent/main/scripts/install_oss.sh | sh
Prefer to install manually?
Omnigent needs Python 3.12+. Install the omnigent package:
uv tool install omnigent # or: pip install "omnigent"
Or with Homebrew:
brew install omnigent-ai/tap/omnigent
Or install straight from the repo:
uv tool install -q --python 3.12 git+https://github.com/omnigent-ai/omnigent.git
Toolchain and prerequisites (if the installer reports a missing tool)
uv(required). https://docs.astral.sh/uv/getting-started/installation/ The installer offers to set this up for you.git(required).- Node.js 22 LTS or newer with
npm, for the npm-installed coding harnesses (Claude, Codex, OpenCode, Pi).omnigent runinstalls the harness CLI you pick. https://docs.npmjs.com/downloading-and-installing-node-js-and-npm - Kiro CLI (optional), for
omnigent kiro: install withcurl -fsSL https://cli.kiro.dev/install | bash, then sign in with Kiro. Kiro tool approvals stay answerable in the embedded Terminal; supported one-time approvals also appear as Chat cards. Seedocs/kiro-native-elicitation.md. tmux, required by the nativeomnigent <harness>terminal wrappers (claude,codex,cursor,hermes,kiro,pi) (brew install tmux/apt install tmux; the installer offers to install it for you).bubblewrap(bwrap), Linux only. The nativeomnigent <harness>terminal wrappers and thepiharness wrap each agent terminal in abwrapOS-sandbox; on Linux that isolation is mandatory, so a missingbwrapbinary makes those terminals fail to start (apt install bubblewrap; the installer offers to install it for you). macOS uses the built-inseatbeltsandbox and needs nothing extra.- Databricks (optional). To use a Databricks workspace as your model
provider, install Omnigent with the
databricksextra:uv tool install "omnigent[databricks]"— or pass it to the bootstrap installer with... | sh -s -- --extra databricks. Signing in to the workspace also uses the Databricks CLI.
Windows (native)
Omnigent runs natively on Windows in a degraded mode. The install_oss.sh
bootstrap is POSIX-only, so install with uv directly:
uv tool install --python 3.12 omnigent
# or from the repo:
uv tool install --python 3.12 git+https://github.com/omnigent-ai/omnigent.git
What works on Windows: omnigent server, the web UI, and the SDK-based
harnesses (omnigent run <agent.yaml> with the claude-sdk / cursor / codex
harnesses). Agents run under a Windows Job Object for process-tree
containment.
What is not available on Windows (use Linux/macOS, or WSL, for these):
- the native
omnigent claude/omnigent codex/omnigent cursortmux/PTY terminal wrappers (run an SDK harness or the web UI instead); bwrap/seatbeltfilesystem & network sandboxing and the L7 egress proxy — the Job Object backend contains the process tree and enforces resource limits but does not isolate the filesystem or network.
Updating to a new release
When a newer release is on PyPI, Omnigent shows a one-line notice (once per release) pointing here. To update:
omni upgrade            # detects how you installed, drains & stops the local
                        # server, then runs the matching upgrade command
omni upgrade --check    # just report whether a newer release is available
omni upgrade waits for in-flight agent sessions to finish before stopping the
local server (pass --force to stop them immediately); the next omni command
brings the server back up on the new version. Source checkouts update with
git pull instead. Silence the notice with OMNIGENT_NO_UPDATE_CHECK=1.
The check queries your configured package index — honoring UV_INDEX_URL /
PIP_INDEX_URL and your uv.toml / pip.conf (default PyPI), so private
mirrors work out of the box; override with OMNIGENT_INDEX_URL if needed.
2. Start your first agent
omnigent picks a model with you and starts a session in your terminal. It
also launches a local web UI at http://localhost:6767 that shows the same
session in the browser, or on a phone on your network (step 4). The
desktop app wraps that same UI
in a native window and adds OS notifications and a dock badge —
download it for macOS.
[!NOTE] The install puts two names for the same CLI on your PATH:
omnigentand the shorteromni. They're interchangeable.[!TIP] On first run, Omnigent picks up model credentials already in your environment (an
ANTHROPIC_API_KEY/OPENAI_API_KEY, or aclaude/codexCLI you're logged into) and offers one as the default.
omnigent
Or launch a specific agent runtime:
omnigent claude                      # Claude Code, in a session your team can join
omnigent codex                       # Codex
omnigent cursor                      # Cursor
omnigent opencode                    # OpenCode
omnigent hermes                      # Hermes Agent (Nous Research)
omnigent pi                          # Pi
🐙 Polly and 🟠🔵 Debby
Two example agents ship with the repo, and they make good first sessions:
omnigent run examples/polly/
omnigent run examples/debby/

# ...or on a different harness (sub-agents keep their own):
omnigent run examples/polly/ --harness <harness>
omnigent run examples/debby/ --harness <harness>
🐙 Polly is a multi-agent coding orchestrator who writes no code herself. She's the tech lead: she plans, delegates the work to coding sub-agents (Claude Code, Codex, or Pi) in parallel git worktrees, then routes each diff to a reviewer from a different vendor than the one that wrote it. You merge.
🟠🔵 Debby is a brainstorming partner with two heads, one Claude and one GPT.
Every question you ask goes to both heads, and she lays the two answers out
side by side. Type /debate and the heads critique each other for a few
rounds before converging. (She needs both a Claude and an OpenAI credential;
see step 3.)
Prefer the browser? Start a server and register your machine as a host:
omnigent server start   # start the local server and web UI in the background
omnigent host           # (separate terminal) register this machine as a host
In the web UI, hit New Chat, pick your machine, and go. Check status with
omnigent server status; stop everything with omnigent stop.
3. Choose & switch models
omnigent setup
Add a credential, set a default, or remove one, grouped by agent. Omnigent works with four kinds of credentials:
| Kind | What it is | |
|---|---|---|
| 🔑 | API key | A first-party vendor key for Anthropic, OpenAI, and similar providers |
| 🎟️ | Subscription | A Claude Pro/Max or ChatGPT plan, via the official claude / codex CLIs |
| 🌐 | Gateway | Any OpenAI- or Anthropic-compatible base_url and key (OpenRouter, LiteLLM, Ollama, vLLM, Azure) |
| 🧱 | Databricks | A Databricks workspace profile (requires the databricks extra) |
Defaults are per agent, so a Claude default and a Codex default coexist. You
can also switch models in the middle of a session with the /model command.
Gateway base URLs (OpenRouter, Ollama)
When you add a Gateway credential, omnigent setup asks for a base URL
and a key. The base URL depends on which agent you point it at:
| Provider | For | Base URL | Key |
|---|---|---|---|
| OpenRouter | Claude Code | https://openrouter.ai/api |
your OpenRouter key (sk-or-…) |
| OpenRouter | Codex / OpenAI agents | https://openrouter.ai/api/v1 |
your OpenRouter key (sk-or-…) |
| Ollama (local) | Codex / OpenAI agents | http://localhost:11434/v1 |
any value (Ollama ignores it) |
For Claude Code, point at OpenRouter's Anthropic-compatible endpoint
(…/api, not …/api/v1). For Codex and the OpenAI-agents harness, use
the OpenAI-compatible …/api/v1.
4. Deploy a server (and use it from your phone📱)
Run Omnigent on a server with a stable URL
(deploy/README.md is the full guide) and your sessions
become reachable from anywhere, including your phone. The web UI is built for
mobile, so you get the same chat, sub-agents, terminals, and files, in sync
with your laptop.
One docker compose up runs the server on any host you have (a VPS, a home
server); Render and Railway deploy with one click; Fly.io, Hugging
Face Spaces, Modal, Cloudflare (serverless, scale-to-zero), and
Databricks Apps (backed by Lakebase Postgres and Unity Catalog Volumes) are
covered too — and a Cloudflare quick tunnel (public) or Tailscale
(private) reaches a server running on your own laptop without a deploy. The
server can also provision a cloud sandbox per session (managed hosts), so no
laptop has to stay online. The full menu of targets, the database options, and
the sandbox setup live in
deploy/README.md.
Once the server is up, sign in and register your laptop as a host:
omnigent login https://your-host    # sign in once; run / attach / host reuse the token
omnigent host  https://your-host    # new sessions can now run on this machine
[!TIP] On your own network you don't need a deploy. Open your machine's LAN address on your phone (e.g.
http://192.168.x.x:6767).
5. Collaborate with your team
Omnigent supports multi-user accounts, controlled by one environment variable:
OMNIGENT_AUTH_ENABLED=1 omnigent server start
The Docker deploy in step 4
turns it on for you (OMNIGENT_AUTH_ENABLED defaults to 1 there).
Invite your teammates
Open the web UI (http://localhost:6767 locally, or your host's URL) and
sign in as admin; first run prints the password and saves it locally. Then
open Admin → Members → Invite to create a single-use invite link, no
email server needed. Send it over; your teammate opens it, sets a password,
and they're in. Signup is invite-only.
[!NOTE] Teammates need to be able to reach the server. A local server is only reachable on your network; for anyone off it, depl
Extension points exported contracts — how you extend this code
MenuRow (Interface)Core symbols most depended-on inside this repo
getShape
Languages
Modules by API surface
Dependencies from manifests, versioned
Datastores touched
For agents
$ claude mcp add omnigent \
  -- python -m otcore.mcp_server <graph>