github.com/microsoft/codetour @v0.0.59 sqlite
README
CodeTour 🗺️
CodeTour is a Visual Studio Code extension, which allows you to record and play back guided walkthroughs of your codebases. It's like a table of contents, that can make it easier to onboard (or re-board!) to a new project/feature area, visualize bug reports, or understand the context of a code review/PR change. A "code tour" is simply a series of interactive steps, each of which are associated with a specific directory, or file/line, and include a description of the respective code. This allows developers to clone a repo, and then immediately start learning it, without needing to refer to a CONTRIBUTING.md file and/or rely on help from others. Tours can either be checked into a repo, to enable sharing with other contributors, or exported to a "tour file", which allows anyone to replay the same tour, without having to clone any code to do it!
Getting Started
In order to get started, install the CodeTour extension, and then following one of the following guides, depending on whether you want to record or play back a tour:
Recording Tours
If you'd like to record a code tour for your codebase, you can simply click the + button in the CodeTour tree view (if it's visible) and/or run the CodeTour: Record Tour command. This will start the tour recorder, which allows you to begin opening files, clicking the "comment bar" for the line you want to annotate, and then adding the respective description (including markdown!). Add as many steps as you want, and then when done, simply click the stop tour action (the red square button). You can also create directory steps, selection steps, or content steps in order to add an introductory or intermediate explanations to a tour.
While you're recording, the CodeTour tree view will display the currently recorded tour, and it's current set of steps. You can tell which tour is being recorded because it will have a microphone icon to the left of its name.
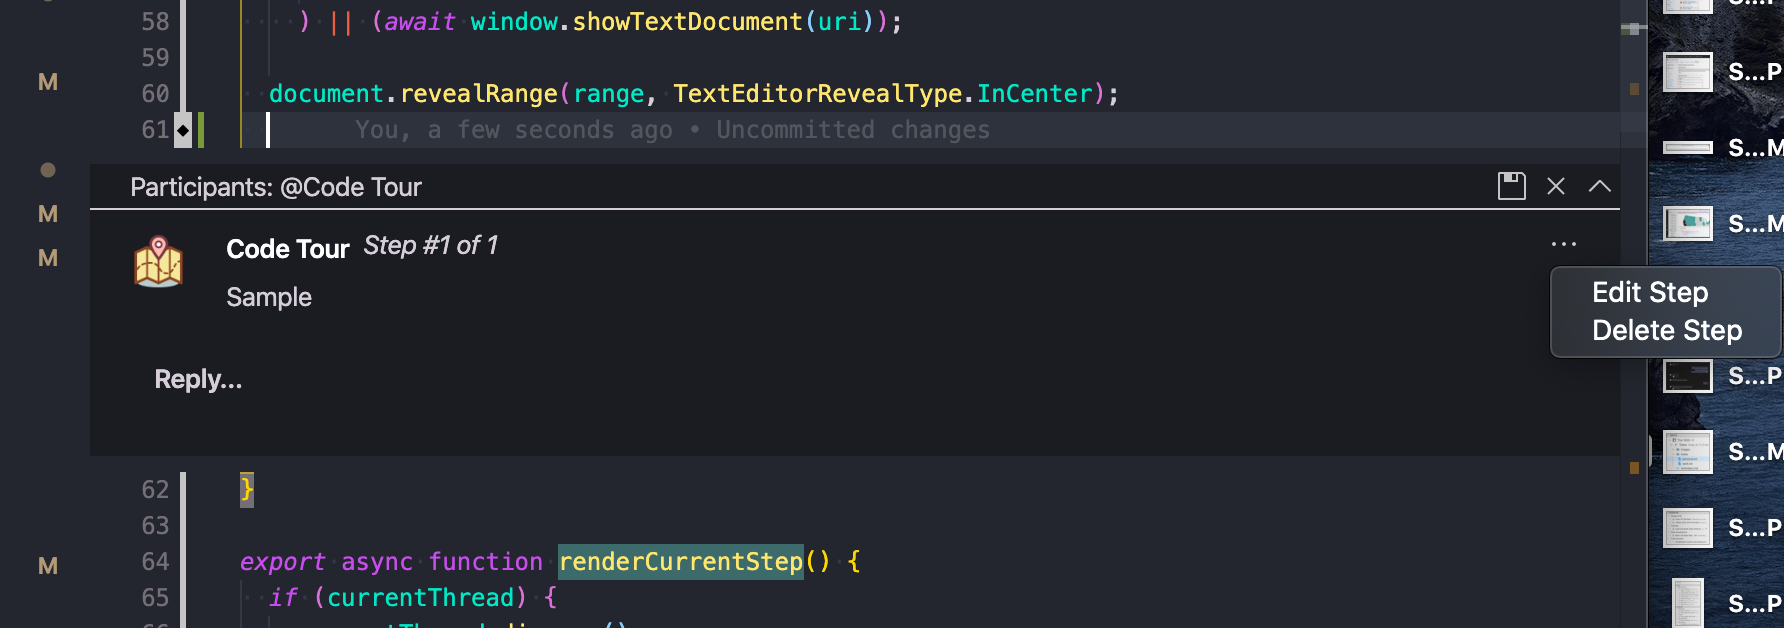
If you need to edit or delete a step while recording, click the ... menu next to the step's description, and select the appropriate action. Alternatively, you can edit/delete steps from the CodeTour tree view.
Workspaces
If you record a tour within a "multi-root workspace", you'll be asked to select the folder that you'd like to save the tour to. This is necessary because tours are written as files to your workspace, and so we need to disambiguate which folder the tour should be persisted to. That said, when you're recording a tour, you can add steps that span any of the folders within the workspace, which allows you to create tours for a specific folder and/or that demonstrate concepts across multiple folders within the workspace.
Step Titles
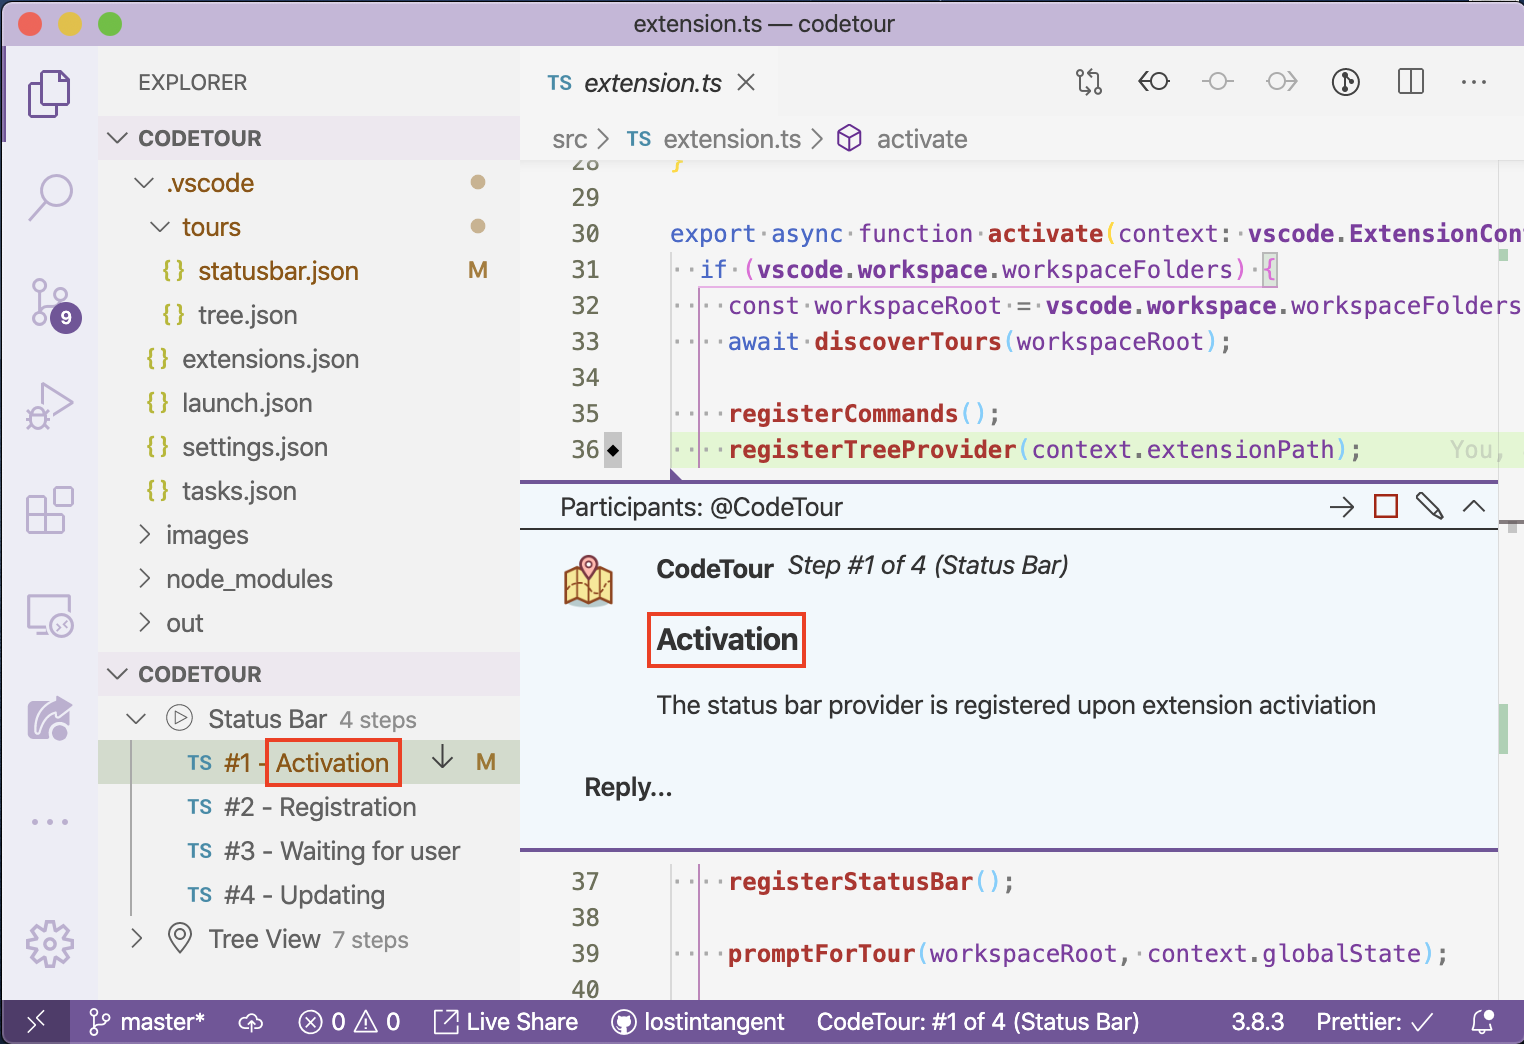
By default, the CodeTour tree displays each tour step using the following display name format: #<stepNumber> - <filePath>. However, if you'd like to give the step a more friendly/recognizeable name, you can do so using one of the following methods:
- Right-click the step in the
CodeTourtree and selectChange Title - Edit the step's description and add a markdown heading to the top of it, using whichever heading level you prefer (e.g.
#,##, etc.). For example, if you add a step whose description starts with### Activation, the step and tree view would look like the following:
Text Selection
By default, each step is associated with the line of code you created the comment on (i.e. the line you clicked the + on the comment bar for). However, if you want to call out a specific span of code as part of the step, simply highlight the code before you add the step (clicking the Add Tour to Step button), and the selection will be captured as part of the step.
If you need to tweak the selection that's associated with a step, simply edit the step, reset the selection and then save it. Furthermore, if you want to create a step from a selection, simply highlight a span a code, right-click the editor and select Add CodeTour Step.
Re-arranging steps
While you're recording a tour, each new step that you add will be appended to the end of the tour. However, you can move existing steps up and down in the order by performing one of the following actions:
- Hover over the step in the
CodeTourtree and click the up/down arrow icon - Right-click the step in the
CodeTourtree and select theMove UporMove Downmenu items - Click the
...menu in the step comment UI and selectMove UporMove Down
Additionally, if you want to add a new step in the middle of a tour, simply navigate to the step that you want to insert a new step after, and then create the new step.
Deleting steps
If you no longer need a specific step in a tour, you can delete it by means of one of the following actions:
- Right-clicking the step in the
CodeTourtree and selectingDelete Step - Navigating to the step in the replay/comment UI, selecting the
...menu next to the comment description and selectingDelete Step
If you need to delete multiple steps, the CodeTour tree supports multi-select, so you can Cmd+click (macOS) / Ctrl+click (Windows/Linux) multiple step nodes, and then right-click them and select Delete Step.
Editing a tour
If you want to edit an existing tour, simply right-click the tour in the CodeTour tree and select Edit Tour. Alternatively, you can edit a tour you're actively viewing by clicking the pencil icon in the current step's comment bar, or running the CodeTour: Edit Tour command.
At any time, you can right-click a tour in the CodeTour tree and change it's title, description or git ref, by selecting the Change Title, Change Description or Change Git Ref menu items. Additionally, you can delete a tour by right-clicking it in the CodeTour tree and selecting Delete Tour.
Linking Tours
If you want to create a series of tours, that a user can navigate through in sequence, then simply prefix your tour title's with the number they represent in the tour order (e.g. 1: Foo, 2 - Bar). When your tours are titled like this, the tour player will automatically provide the following benefis to your readers:
-
If the current tour has a subsequent tour, then it's final step will display a
Next Tourlink instead of theFinish Tourlink. This allows users to easily jump to the next tour. -
If the current tour has a previous tour, then it's first step will display a
Previous Tourlink. This allows users to navigate back to the tour they might have just navigated from.
If you don't want to number your tours like this, but you'd still link to link one tour to another, you can open it's
*.tourfile and set thenextTourproperty to the title of the tour you'd like it to link to.
Primary Tours
A codebase can include one or more tours, but it might have a primary tour, that is intended for new developers to start with. This way, when they open the codebase for the first time, they can be immediately presented with this tour, as opposed to a list of all tours.
In order to mark a specific tour as the primary tour, simply right-click it in the CodeTour tree, and select Make Primary. When you mark a tour as primary, any other tours that were marked as primary, will be updated to remove that annotation. Additionally, if you want to manually unmark a tour as being the primary tour, you can right-click it and select Unmake Primary.
If you'd prefer to number your tours (e.g. 1 - Status Bar), then a tour whose title starts with either #1 - or 1 - will be automatically considered the primary tour, and you don't need to do anything further.
Conditional Tours
If you author a tour that isn't relevant to every developer on the team, then you can decide when to conditionally show it in the CodeTour tree by adding a when property to the respective *.tour file. This property expects a JavaScript expression, that will determine the visibility of the tour, based on whether it evaluates to true or false. By default, all tours are displayed, and therefore, only tours with a when property that evaluate to false will be hidden.
In order to simplify the process of defining conditional tours, the following variables are made available to your when clause:
isLinux- The current user is running on LinuxisMac- The current user is running on macoSisWindows- The current user is running on Windows
For example, if you want to define a tour that is only displayed for Linux users, you can simply set the when property to "isLinux".
CodeTour-Flavored Markdown
When you describe a step, you're able to use the full-breadth of markdown capabilities in order to write rich/compelling content (e.g. images, links, headings, code fences). However, CodeTour also provides some additional syntactic features that allow you to include additional interactivity to your tours:
File References
If you want a step to reference a file in the workspace, you can add a markdown link to it, using a workspace-relative path. For example, adding [Open file](./file.html) to your step content, would add a hyperlink called Open file, that when clicked, would open the ./file.html file.
Additionally, you can reference local images in a step as well, using a markdown reference. For example, adding  would render the icon.png in the step.
Step References
If you want to add a reference to another step within the current tour, you can use markdown's "link reference" syntax, specifying the 1-based number of the step to navigate to, prefixed by a # character (e.g. [#2], or [#23]). This reference will be automatically rendered as a hyperlink, that when clicked, will navigate the end-user to that step. The text of the link will default to #<stepNumber>, but you can customize that by appending a title to the link reference (e.g. `[title][#2]).
This syntax is a simplified version of using the
Navigate to tour stepcommand link manually.
Tour References
If you want to reference an entirely seperate tour, then you can create a link reference, that specifies the title of the tour (e.g. [Tree View]). This will be rendered as a hyperlink, that when clicked, will navigate the end-user to that tour, starting on step #1. If you'd like to navigate the user to a specific step in the tour, you can append the step number after the tour title, seperated by a # (e.g. [Tree View#3]). The text of the link will be rendered as <tourTitle>, but you can customize that by appending a title to the link reference (e.g. [title][Tree View]).
This syntax is a simplified version of using the
Start tourcommand link instead.
Code Blocks
If you add a markdown code block to a step's body content, then the CodeTour player will render an Insert Code link below it, which allows the viewer to automatically insert the code snippet into the current file, at the line that the step is associated with. This can make it easy to use CodeTour for creating interactive tutorials or samples.

Note: The code snippet will be formatted after inserting it into the document, and therefore, you don't need to worry about adding whitespace/etc. to the snippet itself.
Shell Commands
To make it simpler to embed shell commands into a step (e.g. to perform a build, run tests, start an app), CodeTour supports a special >> synax, followed by the shell command you want to run (e.g. >> npm run compile). This will be converted into a hyperlink, that when clicked, will launch a new integrated terminal (called CodeTour) and will run the specified command.

Command Links
In order to add more interactivity to a tour, you can include "command links" to a step's description. Command links are simply markdown links, that use the command: scheme (instead of http: / https:), and specify the name of a VS Code command, along with an optional query string that includes the needed command arguments. Using this syntax, you can call any command in VS Code, including both built-in commands (e.g. vscode.open), as well as commands that are contributed by extensions (e.g. codetour.startTour). For example, the following shows how to include commands with and without arguments.
[Start tour](command:codetour.startTour)


[Open URL](command:vscode.open?["https://aka.ms/codetour"])
Well-Known Commands
In order to make it simpler to call common commands, CodeTour will prompt you with a list of well-known commands as soon as you type command: in a step comment.
Extension points exported contracts — how you extend this code
OpenExternalUriContext (Interface)Core symbols most depended-on inside this repo
startCodeTourShape
Languages
Modules by API surface
Dependencies from manifests, versioned
For agents
$ claude mcp add codetour \
  -- python -m otcore.mcp_server <graph>