github.com/eclipse-zenoh/zenoh-plugin-dds @ros2_0.5.0
Chat with this repoWhat it actually does AI analysis from the code graph — generated when you open this
README




DDS plugin for Eclipse zenoh
Background
The Data Distribution Service (DDS) is a standard for data-centric publish subscribe. Whilst DDS has been around for quite some time and has a long history of deployments in various industries, it has recently gained quite a bit of attentions thanks to its adoption by the Robotic Operating System (ROS2) -- where it is used for communication between ROS2 nodes.
Robot Swarms and Edge Robotics
As mentioned above, ROS2 has adopted DDS as the mechanism to exchange data between nodes within and potentially across a robot. That said, due to some of the very core assumptions at the foundations of the DDS wire-protocol, beside the fact that it leverages UDP/IP multicast for communication, it is not so straightforward to scale DDS communication over a WAN or across multiple LANs. Zenoh, on the other hand was designed since its inception to operate at Internet Scale.
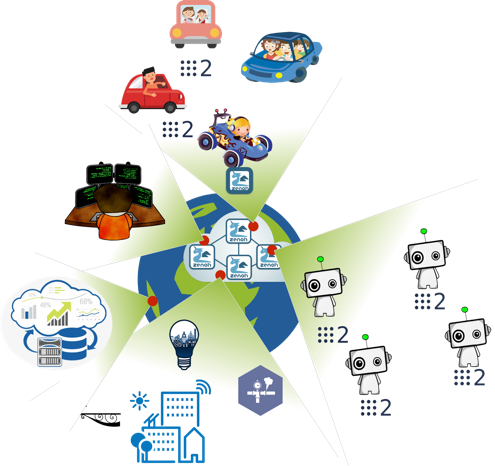
Thus, the main motivations to have a zenoh bridge for DDS are:
- Facilitate the interconnection of robot swarms.
- Support use cases of edge robotics.
- Give the possibility to use zenoh's geo-distributed storage and query system to better manage robot's data.
How to build it
In order to build the zenoh bridge for DDS you need first to install the following dependencies:
- Rust
- On Linux, make sure the
llvmandclangdevelopment packages are installed: - on Debians do:
sudo apt install llvm-dev libclang-dev - on CentOS or RHEL do:
sudo yum install llvm-devel clang-devel - on Alpine do:
apk install llvm11-dev clang-dev - CMake (to build CycloneDDS which is a native dependency)
Once these dependencies are in place, you may clone the repository on your machine:
$ git clone https://github.com/eclipse-zenoh/zenoh-plugin-dds.git
$ cd zenoh-plugin-dds
You can then choose between building the zenoh bridge for DDS: - as a dynamically loaded plugin:
$ cd zplugin-dds
$ cargo build --release
The plugin shared library (*.so on Linux, *.dylib on Mac OS, *.dll on Windows) will be generated in the target/release subdirectory.
- or as a standalone executable binary:
$ cd zenoh-bridge-dds
$ cargo build --release
The zenoh-bridge-dds binary will be generated in the target/release sub-directory.
ROS2 package
If you're a ROS2 user, you can also build zenoh-bridge-dds as a ROS package running:
rosdep install --from-paths . --ignore-src -r -y
colcon build --packages-select zenoh-bridge-dds
The rosdep command will automatically install Rust and clang as build dependencies.
Docker image
The zenoh-bridge-dds standalone executable is also available as a Docker images for both amd64 and arm64. To get it, do:
- docker pull eclipse/zenoh-bridge-dds:master for the master branch version
:warning: However, notice that it's usage is limited to Docker on Linux and using the --net host option.
The cause being that DDS uses UDP multicast and Docker doesn't support UDP multicast between a container and its host (see cases moby/moby#23659, moby/libnetwork#2397 or moby/libnetwork#552). The only known way to make it work is to use the --net host option that is only supported on Linux hosts.
Usage: docker run --init --net host eclipse/zenoh-bridge-dds
It supports the same command line arguments than the zenoh-bridge-dds (see below or check with -h argument).
For a quick test with ROS2 turtlesim
Prerequisites: - A ROS2 environment (no matter the DDS implementation as soon as it implements the standard DDSI protocol - the default Eclipse CycloneDDS being just fine) - The turtlesim package
1 host, 2 ROS domains
For a quick test on a single host, you can run the turtlesim_node and the turtle_teleop_key on distinct ROS domains. As soon as you run 2 zenoh-bridge-dds (1 per domain) the turtle_teleop_key can drive the turtlesim_node.
Here are the commands to run:
- ROS_DOMAIN_ID=1 ros2 run turtlesim turtlesim_node
- ROS_DOMAIN_ID=2 ros2 run turtlesim turtle_teleop_key
- ./target/release/zenoh-bridge-dds -d 1
- ./target/release/zenoh-bridge-dds -d 2
Notice that by default the 2 bridges will discover each other using UDP multicast.
2 hosts, avoiding UDP multicast communication
By default DDS (and thus ROS2) uses UDP multicast for discovery and publications. But on some networks, UDP multicast is not or badly supported.
In such cases, deploying the zenoh-bridge-dds on both hosts will make it to:
- limit the DDS discovery traffic, as detailled in this blog
- route all the DDS publications made on UDP multicast by each node through the zenoh protocol that by default uses TCP.
Here are the commands to test this configuration with turtlesim:
- on host 1:
- ROS_DOMAIN_ID=1 ros2 run turtlesim turtlesim_node
- ./target/release/zenoh-bridge-dds -d 1
- on host 2:
- ROS_DOMAIN_ID=2 ros2 run turtlesim turtle_teleop_key
- ./target/release/zenoh-bridge-dds -d 2 -e tcp/<host-1-ip>:7447 - where <host-1-ip> is the IP of host 1
Notice that to avoid unwanted direct DDS communication, 2 disctinct ROS domains are still used.
2 hosts, with an intermediate zenoh router in the cloud
In case your 2 hosts can't have a point-to-point communication, you could leverage a zenoh router deployed in a cloud instance (any Linux VM will do the job). You just need to configure your cloud instanse with a public IP and authorize the TCP port 7447.
:warning: the zenoh protocol is still under development leading to possible incompatibilities between the bridge and the router if their zenoh version differ. Please make sure you use a zenoh router built from a recent commit id from its master branch.
Here are the commands to test this configuration with turtlesim:
- on cloud VM:
- zenohd
- on host 1:
- ros2 run turtlesim turtlesim_node
- ./target/release/zenoh-bridge-dds -e tcp/<cloud-ip>:7447
where <cloud-ip> is the IP of your cloud instance
- on host 2:
- ros2 run turtlesim turtle_teleop_key
- ./target/release/zenoh-bridge-dds -e tcp/<cloud-ip>:7447
where <cloud-ip> is the IP of your cloud instance
Notice that there is no need to use distinct ROS domain here, since the 2 hosts are not supposed to directly communicate with each other.
More advanced usage for ROS2
Limiting the ROS2 topics, services, parameters or actions to be routed
By default 2 zenoh bridges will route all ROS2 topics and services for which they detect a Writer on one side and a Reader on the other side. But you might want to avoid some topics and services to be routed by the bridge.
Starting zenoh-bridge-dds you can use the --dds-allow argument to specify the subset of topics and services that will be routed by the bridge. This argument accepts a string wich is a regular expression that must match a substring of an allowed zenoh resource (see details of mapping of ROS2 names to zenoh resources).
Here are some examples of usage:
| --dds-allow value | allowed ROS2 communication |
| :-- | :-- |
| /rosout | /rosout|
| /rosout\|/turtle1/cmd_vel\|/turtle1/rotate_absolute | /rosout
/turtle1/cmd_vel
/turtle1/rotate_absolute |
| /rosout\|/turtle1/ | /rosout and all /turtle1 topics, services, parameters and actions |
| /turtle1/.* | all topics and services with name containing /turtle1/ |
| /turtle1/ | same: all topics, services, parameters and actions with name containing /turtle1/ |
| /rt/turtle1 | all topics with name containing /turtle1 (no services, parameters or actions) |
| /rq/turtle1\|/rr/turtle1 | all services and parameters with name containing /turtle1 (no topics or actions) |
| /rq/turtlesim/.*parameter\|/rr/turtlesim/.*parameter | all parameters with name containing /turtlesim (no topics, services or actions) |
| /rq/turtle1/.*/_action\|/rr/turtle1/.*/_action | all actions with name containing /turtle1 (no topics, services or parameters) |
Running several robots without changing the ROS2 configuration
If you run similar robots in the same network, they will by default all us the same DDS topics, leading to interferences in their operations.
A simple way to address this issue using the zenoh bridge is to:
- deploy 1 zenoh bridge per robot
- have each bridge started with the --dds-scope "/<id>" argument, each robot having its own id.
- make sure each robot cannot directly communicate via DDS with another robot by setting a distinct domain per robot, or configuring its network interface to not route UDP multicast outside the host.
Using the --dds-scope option, a prefix is added to each zenoh resource published/subscribed by the bridge (more details in mapping of ROS2 names to zenoh resources). To interact with a robot, a remote ROS2 application must use a zenoh bridge configured with the same scope than the robot.
Closer integration of ROS2 with zenoh
As you understood, using the zenoh bridge, each ROS2 publications and subscriptions are mapped to a zenoh resource. Therefore, its relatively easy to develop an application using one of the zenoh APIs to interact with one or more robot at the same time.
See in details how to achieve that in this blog.
All zenoh-bridge-dds command line arguments
zenoh-bridge-dds accepts the following arguments:
* zenoh-related arguments:
- -m, --mode <MODE> : The zenoh session mode. Default: peer Possible values: peer or client.
See zenoh documentation for more details.
- -l, --listener <LOCATOR> : The locators the bridge will listen on for zenoh protocol. Can be specified multiple times. Example of locator: tcp/localhost:7447.
- -e, --peer <LOCATOR> : zenoh peers locators the bridge will try to connect to (typically another bridge or a zenoh router). Example of locator: tcp/<ip-address>:7447.
- --no-multicast-scouting : disable the zenoh scouting protocol that allows automatic discovery of zenoh peers and routers.
- --rest-plugin : activate the zenoh REST API, available by default on port 8000.
- --rest-http-port <rest-http-port> : set the REST API http port (default: 8000)
* DDS-related arguments:
- -d, --dds-domain <ID> : The DDS Domain ID (if using with ROS this should be the same as ROS_DOMAIN_ID)
- -s, --dds-scope <String> : A string used as prefix to scope DDS traffic when mapped to zenoh resources.
- -a, --dds-allow <String>: A regular expression matching the set of 'partition/topic-name' that must
be routed. By default, all partitions and topic are allowed.
Examples of expressions:
- .*/TopicA will allow only the TopicA to be routed, whatever the partition.
- PartitionX/.* will allow all the topics to be routed, but only on PartitionX.
- cmd_vel|rosout will allow only the topics containing cmd_vel or rosout in their name or partition name to be routed.
- -w, --dds-generalise-pub <String> : A list of key expressions to use for generalising the declaration of
the zenoh publications, and thus minimizing the discovery traffic (usable multiple times).
See this blog for more details.
- -r, --dds-generalise-sub <String> : A list of key expressions to use for generalising the declaration of
the zenoh subscriptions, and thus minimizing the discovery traffic (usable multiple times).
See this blog for more details.
Admin space
The zenoh bridge for DDS exposes and administration space allowing to browse the DDS entities that have been discovered (with their QoS), and the routes that have been established between DDS and zenoh.
This administration space is accessible via any zenoh API, including the REST API that you can activate at zenoh-bridge-dds startup using the --rest-plugin argument.
The zenoh-bridge-dds exposes this administration space with paths prefixed by /@/service/<uuid>/dds (where <uuid> is the unique identifier of the bridge instance). The informations are then organized with such paths:
- /@/service/<uuid>/dds/version : the bridge version
- /@/service/<uuid>/dds/config : the bridge configuration
- /@/service/<uuid>/dds/participant/<gid>/reader/<gid>/<topic> : a discovered DDS r
Core symbols most depended-on inside this repo
cloneShape
Languages
Modules by API surface
For agents
$ claude mcp add zenoh-plugin-dds \
  -- python -m otcore.mcp_server <graph>