github.com/conda-forge/conda-smithy @v2026.6.14
Chat with this repoWhat it actually does AI analysis from the code graph — generated when you open this
README
Overview
conda-smithy is a tool for combining a conda recipe with configurations to build using freely hosted CI services into a single repository, also known as a feedstock.
conda-smithy is still a work-in-progress, but when complete, conda-smithy will:
- Create a git repo with a conda recipe and the files to run conda builds via CI services.
- Register the repo on github and push it.
- Connect the repo to the CI services travis-ci.com, appveyor.com, circleci.com, dev.azure.com (For travis-ci.com, configure your org or user to enable the service for all repos)


Installation
The easiest way to install conda-smithy is to use conda and conda-forge:
conda install -n root -c conda-forge conda-smithy
To install conda-smithy from source, see the requirements file in requirements.txt, clone this
repo, and python -m pip install ..
Setup
You need a token from github, travis-ci.com, appveyor.com and circleci.com to try out
conda-smithy. The commands which need this will tell you where to get these tokens and where to
place them. If you need help getting tokens please ask on the
conda-forge google group.
You should be able to test parts of conda-smithy with whatever tokens you have.
For example, you should be able to conda smithy register-github without the CI service tokens.
Re-rendering an existing feedstock is also possible without CI service tokens set.
Re-rendering an existing feedstock
Periodically feedstocks need to be upgraded to include new features. To do
this we use conda-smithy to go through a process called re-rendering.
Make sure you have installed conda-smithy before proceeding.
Re-rendering an existing feedstock is possible without CI service tokens set.
cd <feedstock directory>conda smithy rerender [--commit]- Commit and push all changes
Optionally one can commit the changes automatically with conda-smithy version 1.4.1+.
To do this just use the --commit/-c option. By default this will open an editor to make a commit.
It will provide a default commit message and show the changes to be added. If you wish to do this
automatically, please just use --commit auto/-c auto and it will use the stock commit message.
Making a new feedstock
-
Make the feedstock repo:
conda smithy init
<directory_of_conda_recipe>
. For a recipe calledfoo, this creates a directory calledfoo-feedstock, populates it with CI setup skeletons, adds the recipe underrecipeand initializes it as a git repo. -
Create a github repo:
conda smithy register-github --organization conda-forge ./foo-feedstock. This requires a github token. You can try it out with a github user account instead of an organization by replacing the organization argument with--user github_user_name. If you are interested in adding teams for your feedstocks, you can provide the--add-teamsoption to create them. This can be done when creating the feedstock or after. -
Register the feedstock with CI services:
conda smithy register-ci --organization conda-forge --feedstock_directory ./foo-feedstock. This requires tokens for the CI services. You can give the name of a user instead of organization with--user github_user_name. By default this command requires an Anaconda/Binstar token to be available in~/.conda-smithy/anaconda.token, or as BINSTAR_TOKEN in the environment. This can be opted out of by specifying--without-anaconda-token, as such execpted package uploads will not be attempted.- For Azure, you will have to create a service connection with the same name as your github user or org
https://dev.azure.com/YOUR_ORG/feedstock-builds/_settings/adminservices - For Azure builds, you will have to export the environment variable
AZURE_ORG_OR_USERto point to your Azure org - If this is your first build on Azure, make sure to add Library Variable Group containing your BINSTAR_TOKEN for automated anaconda uploads.
- For Azure, you will have to create a service connection with the same name as your github user or org
-
Specify the feedstock channel and label: Optionally, you can specify source channels and choose a channel to upload to in
recipe/conda_build_config.yaml. ```yaml channel_sources:- mysourcechannel1,mysourcechannel2,conda-forge,defaults channel_targets:
- target_channel target_label
`` Default source channels areconda-forge,defaults. Default for channel targets isconda-forge main`.
-
Specify your branding in the README.md: Optionally, you can specify the branding on the README.md file by adding the following the
conda-forge.ymlfile:github: user_or_org: YOUR_GITHUB_USER_OR_ORG -
Re-render the feedstock:
conda smithy rerender --feedstock_directory ./foo-feedstock -
Commit the changes:
cd foo-feedstock && git commit, then pushgit push upstream master.
Running a build
When everything is configured you can trigger a build with a push to the feedstock repo on github.
Developing conda-smithy
To develop conda smithy, use your favortite conda-based environment manager and create an environment based on the environment.yml.
$ conda env create
Releasing conda-smithy
Before making a release, consult @conda-forge/core and wait some time for objections.
To release a new version of conda-smithy, you can use the
rever release managment tool.
Run rever in the root repo directory with the version number you want to release.
For example,
$ rever 0.1.2
Deprecation policy
conda-smithy's API is defined as the collection of all reachable symbols whose fully qualified import
path does not feature a leading underscore in any of its components. The API covers renames
and, if callable, changes in signatures (argument and keyword argument names and types,
plus the return types). The API also covers the command-line interface. Any other symbol may change
at any time and has no guaranteed API.
All API changes must undergo a 60-day deprecation period, must be clearly indicated via
a DeprecationWarning, and must have a news entry in the Deprecated section.
Conda-smithy in a nutshell
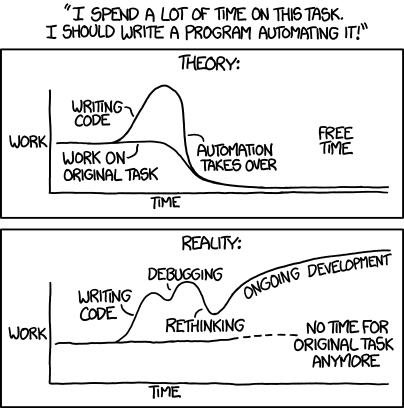
xkcd 1319: Automation
Core symbols most depended-on inside this repo
parse_variantShape
Languages
Modules by API surface
For agents
$ claude mcp add conda-smithy \
  -- python -m otcore.mcp_server <graph>