github.com/brenpoly/be-more-agent @v1.0-enclosure
Chat with this repoBrowse by type
What it actually does AI analysis from the code graph — generated when you open this
README
Be More Agent 🤖
A Customizable, Offline-First AI Agent for Raspberry Pi
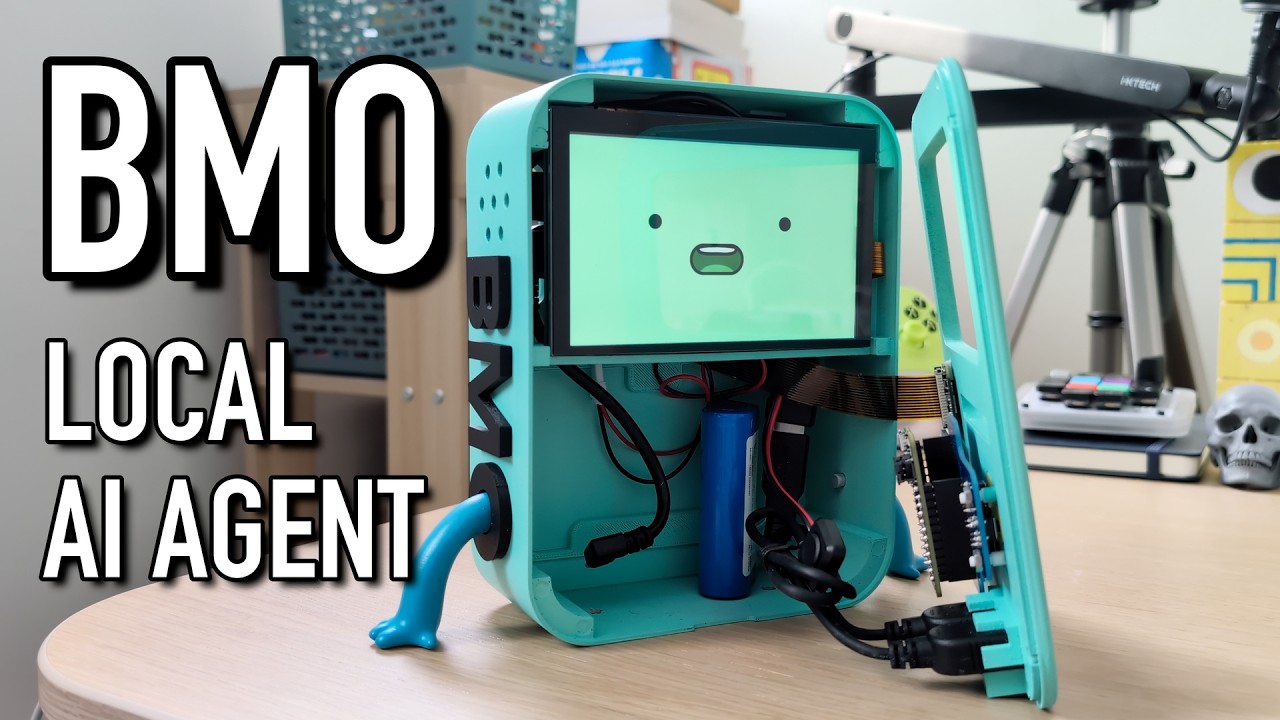



This project turns a Raspberry Pi into a fully functional, conversational AI agent. Unlike cloud-based assistants, this agent runs 100% locally on your device. It listens for a wake word, processes speech, "thinks" using a local Large Language Model (LLM), and speaks back with a low-latency neural voice—all while displaying reactive face animations.
It is designed as a blank canvas: You can easily swap the face images and sound effects to create your own character!
✨ Features
- 100% Local Intelligence: Powered by Ollama (LLM) and Whisper.cpp (Speech-to-Text). No API fees, no cloud data usage.
- Open Source Wake Word: Wakes up to your custom model using OpenWakeWord (Offline & Free). No access keys required.
- Hardware-Aware Audio: Automatically detects your microphone's sample rate and resamples audio on the fly to prevent ALSA errors.
- Smart Web Search: Uses DuckDuckGo to find real-time news and information when the LLM doesn't know the answer.
- Reactive Faces: The GUI updates the character's face based on its state (Listening, Thinking, Speaking, Idle).
- Fast Text-to-Speech: Uses Piper TTS for low-latency, high-quality voice generation on the Pi.
- Vision Capable: Can "see" and describe the world using a connected camera and the Moondream vision model.
🛠️ Hardware Requirements
- Raspberry Pi 5 (Recommended) or Pi 4 (4GB RAM minimum)
- USB Microphone & Speaker
- LCD Screen (DSI or HDMI)
- Raspberry Pi Camera Module
📂 Project Structure
be-more-agent/
├── agent.py                   # The main brain script
├── setup.sh                   # Auto-installer script
├── wakeword.onnx              # OpenWakeWord model (The "Ear")
├── config.json                # User settings (Models, Prompt, Hardware)
├── chat_memory.json           # Conversation history
├── requirements.txt           # Python dependencies
├── whisper.cpp/               # Speech-to-Text engine
├── piper/                     # Piper TTS engine & voice models
├── sounds/                    # Sound effects folder
│   ├── greeting_sounds/       # Startup .wav files
│   ├── thinking_sounds/       # Looping .wav files
│   ├── ack_sounds/            # "I heard you" .wav files
│   └── error_sounds/          # Error/Confusion .wav files
└── faces/                     # Face images folder
    ├── idle/                  # .png sequence for idle state
    ├── listening/             # .png sequence for listening
    ├── thinking/              # .png sequence for thinking
    ├── speaking/              # .png sequence for speaking
    ├── error/                 # .png sequence for errors
    └── warmup/                # .png sequence for startup
🚀 Installation
1. Prerequisites
Ensure your Raspberry Pi OS is up to date.
sudo apt update && sudo apt upgrade -y
sudo apt install git -y
2. Install Ollama
This agent relies on Ollama to run the brain.
curl -fsSL https://ollama.com/install.sh| sh
Pull the required models:
ollama pull gemma:2b
ollama pull moondream
3. Clone & Setup
git clone https://github.com/brenpoly/be-more-agent.git
cd be-more-agent
chmod +x setup.sh
./setup.sh
The setup script will install system libraries, create necessary folders, download Piper TTS, and set up the Python virtual environment.
4. Configure the Wake Word
The setup script downloads a default wake word ("Hey Jarvis"). To use your own:
1. Train a model at OpenWakeWord.
2. Place the .onnx file in the root folder.
3. Rename it to wakeword.onnx.
5. Run the Agent
source venv/bin/activate
python agent.py
📂 Configuration (config.json)
You can modify the hardware behavior and personality in config.json. The agent.py script creates this on the first run if it doesn't exist, but you can create it manually:
{
    "text_model": "gemma3:1b",
    "vision_model": "moondream",
    "voice_model": "piper/en_GB-semaine-medium.onnx",
    "chat_memory": true,
    "camera_rotation": 0,
    "system_prompt_extras": "You are a helpful robot assistant. Keep responses short and cute."
}
🎨 Customizing Your Character
This software is a generic framework. You can give it a new personality by replacing the assets:
- Faces: The script looks for PNG sequences in
faces/[state]/. It will loop through all images found in the folder. - Sounds: Put multiple
.wavfiles in thesounds/[category]/folders. The robot will pick one at random each time (e.g., different "thinking" hums or "error" buzzes).
🗣️ The Custom BMO Voice
This project features a custom, locally fine-tuned text-to-speech model to make the agent sound authentic!
When you run the setup.sh script, it will automatically download the compiled .onnx model and its .json configuration file from the Releases page and place them into a local voices/ directory.
Manual Installation (if you are not using setup.sh):
1. Download bmo.onnx and bmo.onnx.json from the Latest Release.
2. Create a folder named voices/ in the root directory of this repository.
3. Place both downloaded files inside the voices/ folder.
4. Ensure your config.json file points to the new model:
```json
"voice_model": "voices/bmo.onnx"
⚠️ Troubleshooting
- "No search library found": If web search fails, ensure you are in the virtual environment and
duckduckgo-searchis installed via pip. - Shutdown Errors: When you exit the script (Ctrl+C), you might see
Expression 'alsa_snd_pcm_mmap_begin' failed. This is normal. It just means the audio stream was cut off mid-sample. It does not affect the functionality. - Audio Glitches: If the voice sounds fast or slow, the script attempts to auto-detect sample rates. Ensure your
config.jsonpoints to a valid.onnxvoice model in thepiper/folder. If your custom BMO voice sounds incredibly deep, slow, or "demonic," don't panic! This is not an issue with the Piper installation or the setup script. It is almost always caused by a Sample Rate (Hz) mismatch between the model and the audio player.
Here is how to fix it:
Fix 1: Match the Sample Rate
By default, agent.py expects "medium" quality models and plays audio at 22050 Hz. If your custom model was trained at a different quality (like 48000 Hz or 16000 Hz), playing it at the default rate will stretch or compress the audio, severely altering the pitch.
- Open your model's configuration file (e.g.,
voices/bmo.onnx.json). - Look for the
"sample_rate"property and note the number (e.g.,22050,16000,48000). - Open
agent.pyand find the line:PIPER_RATE = 22050. - Change that number to match the sample rate in your
.jsonfile. - Save the file and restart the agent.
Fix 2: Check the Length Scale If the sample rates match perfectly, the issue might be the model's internal pacing setting.
- Open your
voices/bmo.onnx.jsonfile. - Look inside the
"inference"block for a setting called"length_scale". - Piper uses this to determine the speed of the voice. If this value is set significantly higher than
1.0, it will stretch the audio and make BMO sound like a zombie. Lower it closer to1.0to speed the voice back up to normal.
📄 License
This project is dual-licensed:
- Software / Code: All source code is licensed under the MIT License.
- Hardware / 3D Models: The
.obj,.stl, and other 3D modeling files associated with the physical case are licensed under the Creative Commons Attribution-NonCommercial-ShareAlike 4.0 International License
⚖️ Legal Disclaimer
Disclaimer: Fan Project This repository and the associated voice model are a non-commercial, open-source fan project. "BMO" and Adventure Time are registered trademarks and copyrights of Cartoon Network and Warner Bros. Discovery. This project is not affiliated with, endorsed by, or sponsored by Cartoon Network or its parent companies.
Voice Model Attribution The text-to-speech capabilities of this project are powered by Piper. The custom voice model was fine-tuned locally using Piper's base "Amy" model (en_US-amy-medium). The original Piper engine and base models are developed by the Rhasspy project and distributed under the MIT License.
Core symbols most depended-on inside this repo
Shape
Languages
Modules by API surface
For agents
$ claude mcp add be-more-agent \
  -- python -m otcore.mcp_server <graph>