github.com/async-labs/saas @v2.0.0
Chat with this repoWhat it actually does AI analysis from the code graph — generated when you open this
README
Boilerplate App for SaaS Product
Open source web app that saves you weeks of work when building your own SaaS product.
- The boilerplate app comes with many basic SaaS features (see Features below) so that you are able to focus on features that differentiate your product.
- We built this boilerplate for ourselves to focus more on what matters. We've used it to quickly launch async, builderbook, and other real-world SaaS web apps.
Live demo:
- https://saas-app.async-await.com
Contents
- Features
- Run locally
- Stage locally
- Deploy
- Built with
- Screenshots
- Showcase
- Contributing
- Team
- License
- Project structure
Features
- Server-side rendering for fast initial load and SEO.
- User authentication with Google, cookie, and session.
- Production-ready Express server with compression, parser, and helmet.
- Transactional emails (
AWS SES): welcome, team invitation, and payment. - Adding email addresses to newsletter lists (
Mailchimp): new users, paying users. - File upload, load, and deletion (
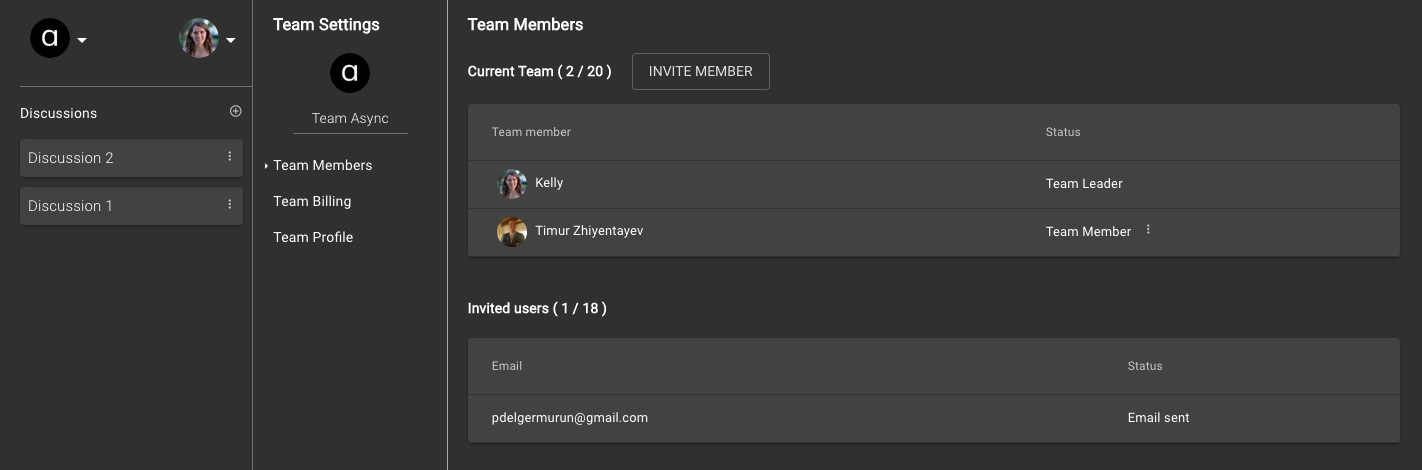
AWS S3) with pre-signed request for: Posts, Team Profile, and User Profile. - Team creation, Team Member invitation, and settings for Team and User.
- Opinionated architecture:
- keeping babel and webpack configurations under the hood,
- striving to minimize number of configurations,
withAuthHOC to pass user prop and control user access to pages,withLayoutHOC for shared layout and to pass additional data to pages,withStoreHOC, developer-friendly state management withMobX,- server-side rendering with
Material-UI, - model-specific components in addition to common components.
- Universally-available environmental variables at runtime.
- Server-side environmental variables managed with
dotenv. - Browser-side environmental variables managed with
Next.jsandwebpack'sprocess.envsubstitution (see./app/.env.blueprint). - Custom logger (configure what not to print in production).
- Useful components for any web app:
ActiveLink,AutoComplete,Confirm,Notifier,MenuWithLinks, and more. - Analytics with
Google Analytics. Docker CEIntegration:- spawn
MongoDBdatabase for development. - stage service stack with lean container images.
- Production-ready, scalable architecture:
app- user-facing web app with Next/Express server, responsible for rendering pages (either client-side or server-side).appsends requests via API methods and fetch toapiserver's Express routes.api- server-only web app with Express server, responsible for processing requests for internal and external APIs.- we prepared both apps for easy deployment to
nowby Zeit. - Subscriptions with
Stripe: - subscribe/unsubscribe Team to plan,
- update card information,
- verified Stripe webhook for failed payment for subscription.
Running api locally:
- Before running, create a
.envfile inside theapifolder with the environmental variables listed below.
This file must have values for the required variables.
To use all features and third-party integrations, also add the optional variables.
api/.env:
``` # Used in api/server/app.ts MONGO_URL=mongodb://saas:secret@localhost:27017/saas SESSION_NAME=xxxxxx SESSION_SECRET=xxxxxx
# Used in api/server/google.ts GOOGLE_CLIENTID=xxxxxx GOOGLE_CLIENTSECRET=xxxxxx
# Used in api/server/aws-s3.ts and api/server/aws-ses.ts AMAZON_ACCESSKEYID=xxxxxx AMAZON_SECRETACCESSKEY=xxxxxx
# Used in api/server/models/Invitation.ts and api/server/models/User.ts EMAIL_SUPPORT_FROM_ADDRESS=pedro@pmc.digital
# Used in api/server/mailchimp.ts MAILCHIMP_API_KEY=xxxxxx MAILCHIMP_REGION=xxxx MAILCHIMP_SAAS_ALL_LIST_ID=xxxxxx
# All env variables above this line are needed for successful user signup
# Used in api/server/stripe.ts STRIPE_TEST_SECRETKEY=sk_test_xxxxxx STRIPE_LIVE_SECRETKEY=sk_live_xxxxxx
STRIPE_TEST_PUBLISHABLEKEY=pk_test_xxxxxx STRIPE_LIVE_PUBLISHABLEKEY=pk_live_xxxxxx
STRIPE_TEST_PLANID=plan_xxxxxx STRIPE_LIVE_PLANID=plan_xxxxxx
STRIPE_LIVE_ENDPOINTSECRET=whsec_xxxxxx
# Optionally determine the URL URL_APP=http://localhost:3000 URL_API=http://localhost:8000 COOKIE_DOMAIN=localhost ```
Important: The above environmental variables are available on the server only. You should add your .env file to .gitignore inside the api folder so that your secret keys are not stored on a remote Github repo.
- To get
MONGO_URL, we recommend you runyarn stage:dbto spawn a database locally or a free MongoDB at mLab. - Specify your own name and secret keys for Express session: SESSION_NAME and SESSION_SECRET
-
Get
GOOGLE_CLIENTIDandGOOGLE_CLIENTSECRETby following the official OAuth tutorial.Important: For Google OAuth app, callback URL is: http://localhost:8000/oauth2callback
Important: You have to enable Google+ API in your Google Cloud Platform account.
-
Once
.envis created, you can run theapiapp. Navigate to theapifolder, runyarn installto add all packages, then run the command below:yarn dev
Running app locally:
-
Navigate to the
appfolder, runyarnto add all packages, then runyarn devand navigate tohttp://localhost:3000: -
A
.envfile in theappfolder is not required to run, but you can create one to override the default variables:
STRIPEPUBLISHABLEKEY=pk_test_xxxxxxxxxxxxxxx
    BUCKET_FOR_POSTS=xxxxxx
    BUCKET_FOR_TEAM_AVATARS=xxxxxx
    LAMBDA_API_ENDPOINT=xxxxxxapi
    URL_APP=http://localhost:3000
    URL_API=http://localhost:8000
    GA_TRACKING_ID=
- To get
GA_TRACKING_ID, set up Google Analytics and follow these instructions to find your tracking ID. -
To get
STRIPEPUBLISHABLEKEY, go to your Stripe dashboard, clickDevelopers, then clickAPI keys. -
For successful file uploading, make sure your buckets have proper CORS configuration. Go to your AWS account, find your bucket, go to
Permissions > CORS configuration, add:
```
http://localhost:3000 http://app.saas.localhost:3000 https://saas-app.async-await.com POST GET PUT DELETE HEAD ETag x-amz-meta-custom-header * ```
-
Make sure to update allowed origin with your actual
URL_APP. In our case, it'shttps://saas-app.async-await.comfor production,http://app.saas.localhost:3000for staging locally andhttp://localhost:3000for development. -
Once
.envis created, you can run theappapp. Navigate to theappfolder, runyarn installto add all packages, then run the command below:yarn dev
Run both app and api in the same shell
- Install dependencies: either run
yarn install --no-lockfileat project's root or go toappandapifolders and runyarn installin each folder. - Add env variables as shown above, and then run
yarn devon the root of the project, it should initiate bothapiandappon the same shell. Alternatively, start each app in its own terminal shell by going toappandapifolders and runningyarn devin each folder.
Stage database for development with Docker
If you're not DB ready when starting the boilerplate, you can now spawn a mongo docker container with yarn stage:db on the root of the project that will configure a default database and users.
The compose file is configured to stage the db with default values, but you can override them with a new root .env file (more details below) containing the expected variables to launch a mongo docker image, and mongo-express. My recommended stage settings are:
MONGO_INITDB_ROOT_USERNAME=root
MONGO_INITDB_ROOT_PASSWORD=supersecret
MONGO_INITDB_DATABASE=saas
MONGO_NON_ROOT_USERNAME=saas
MONGO_NON_ROOT_PASSWORD=secret

# mongo-express config
ME_CONFIG_MONGODB_SERVER=saas-mongo
ME_CONFIG_MONGODB_ADMINUSERNAME=root
ME_CONFIG_MONGODB_ADMINPASSWORD=supersecret
Once it starts you need to have MONGO_URL=mongodb://saas:secret@localhost:27017/saas connection string on your api/.env because the container exposes port 27017 to consume under localhost instead of being on the same network.
Please note the docker-compose.yml configuration includes a volume for saas-mongo that persists data to your local path /tmp/saas-db across container restarts.
Stage apps locally with Docker
Use docker-compose to build a new stack of the services whenever you change dependencies, refactor, or you can also use this workflow if you don't want to install all the dependencies to build the stack.
Create the new root .env file (as shown bellow) and then run yarn stage on the project's root directory to build the images, and then yarn stage:start to start the containers. The app will be available on http://app.saas.localhost:3000.
On another shell run yarn stage:stop and yarn stage:clean to stop all the container and clean them.
With the containers running you can also sh into them by running yarn sh:api or yarn sh:app, there are other scripts, please have a look at the root's project.json file.
Please note the first time you run the stage, there maybe a connection timeout whilst the mongo instance creates the first database/user, if that's the case just restart the stack.
Example new root .env for staging with Docker
This file is optional and only if you would like to use docker-compose to stage the project.
# compose
COMPOSE_TAG_NAME=stage

# common to api and app (build and run)
LOG_LEVEL=notice
NODE_ENV=development
URL_APP=http://app.saas.localhost:3000
URL_API=http://api.saas.localhost:8000
API_PORT=8000
APP_PORT=3000

# api (run)
MONGO_URL=mongodb://saas:secret@saas-mongo:27017/saas
SESSION_NAME=saas.localhost.sid
SESSION_SECRET=3NvS3Cr3t!
COOKIE_DOMAIN=.saas.localhost
GOOGLE_CLIENTID=
GOOGLE_CLIENTSECRET=
AMAZON_ACCESSKEYID=
AMAZON_SECRETACCESSKEY=
EMAIL_SUPPORT_FROM_ADDRESS=
MAILCHIMP_API_KEY=
MAILCHIMP_REGION=
MAILCHIMP_SAAS_ALL_LIST_ID=
STRIPE_TEST_SECRETKEY=
STRIPE_LIVE_SECRETKEY=
STRIPE_TEST_PUBLISHABLEKEY=
STRIPE_LIVE_PUBLISHABLEKEY=
STRIPE_TEST_PLANID=
STRIPE_LIVE_PLANID=
STRIPE_LIVE_ENDPOINTSECRET=

# app (build and run)
STRIPEPUBLISHABLEKEY=
BUCKET_FOR_POSTS=
BUCKET_FOR_TEAM_AVATARS=
LAMBDA_API_ENDPOINT=
GA_TRACKING_ID=

# mongo config
MONGO_INITDB_ROOT_USERNAME=root
MONGO_INITDB_ROOT_PASSWORD=supersecret
MONGO_INITDB_DATABASE=saas
MONGO_NON_ROOT_USERNAME=saas
MONGO_NON_ROOT_PASSWORD=secret

# mongo-express config
ME_CONFIG_MONGODB_SERVER=saas-mongo
ME_CONFIG_MONGODB_ADMINUSERNAME=root
ME_CONFIG_MONGODB_ADMINPASSWORD=supersecret
Deploy with Heroku
To deploy the two apps (api and app), you can follow these instructions to deploy each app individually to Heroku:
https://github.com/builderbook/builderbook/blob/master/README.md#deploy-to-heroku
You are welcome to deploy to any cloud provider. Eventually, we will publish a tutorial for AWS Elastic Beanstalk.
Built with
For more detail, check package.json files in both app and api folders and project's root.
To customize styles, check this guide.
Screenshots
Dashboard showing Discussion > Posts:

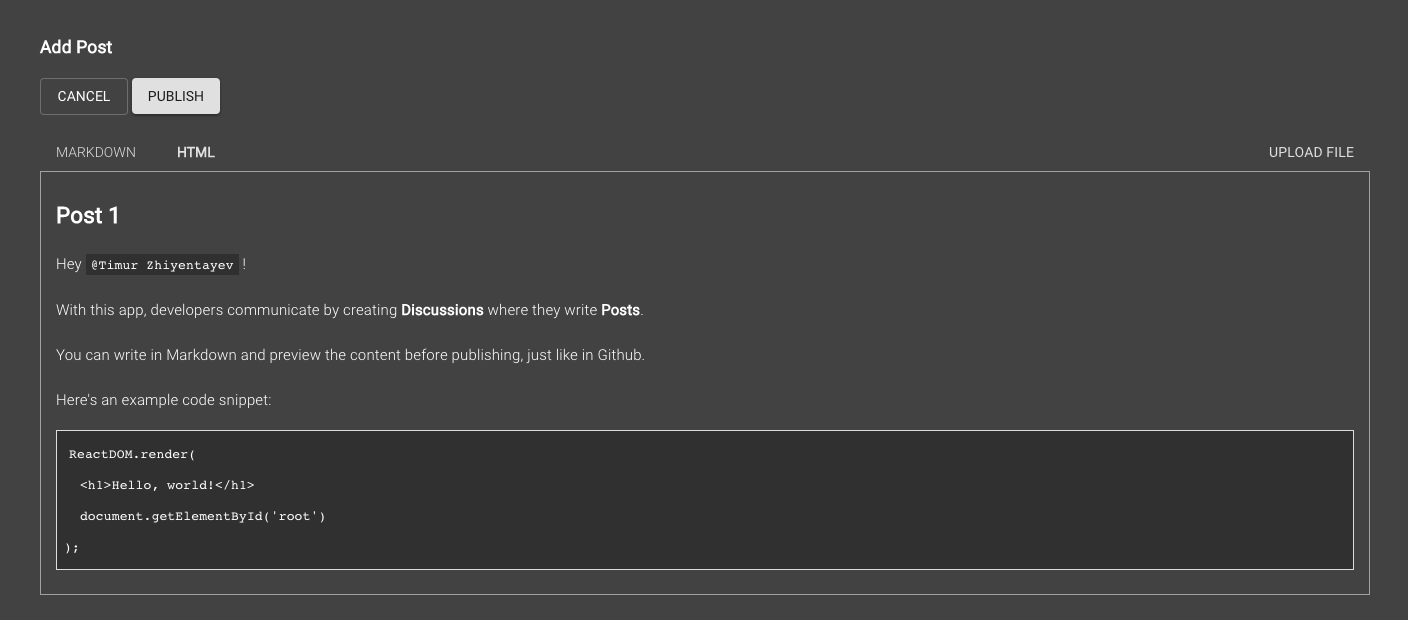
Adding a Post, Markdown vs. HTML view:

Settings for Team Members:
Team Billing:

Settings for Team Profile:

Settings for Personal Profile:
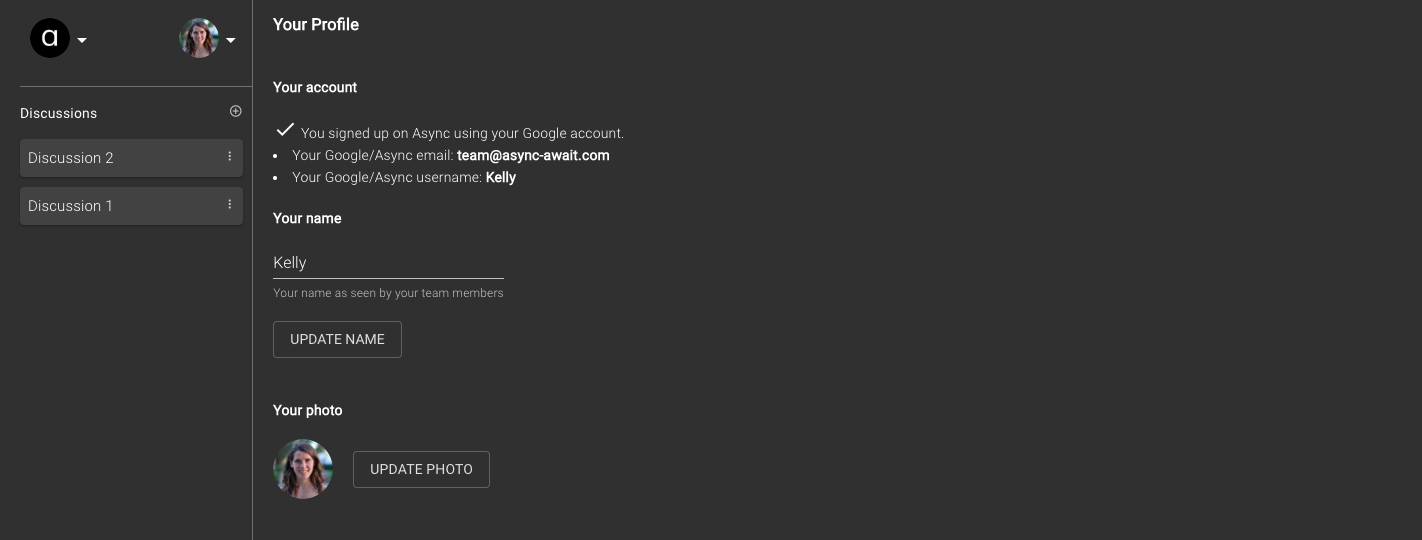
Add/Update