github.com/alexandru/github-webhook-listener @v3.0.4
Chat with this repoWhat it actually does AI analysis from the code graph — generated when you open this
README
GitHub Webhook Listener (ver. 3)


A simple web app that can be registered as a GitHub Webhook and trigger shell commands in response to events.
Main use-case is to trigger refreshes of websites hosted on your own server via CI jobs (e.g., GitHub Actions), but in a secure way, without exposing server credentials or SSH keys.
The server process is also light in resource usage, not using more than 10 MB of RAM, so it can be installed on under-powered servers.
NOTE
This project has been rewritten in Rust (ver. 3.0). Previous versions were written in Kotlin (see v2-kotlin branch) and Haskell (see v1-haskell branch).
Setup
Docker images are published via GitHub's Packages. You can quickly run a process like this:
docker run \
  -p 8080:8080 \
  -ti ghcr.io/alexandru/github-webhook-listener:latest
The Docker image contains a statically-linked Rust binary that is highly optimized for size and performance, using less than 10 MB of RAM in typical usage.
Server Configuration
The server supports both YAML and HOCON configuration formats. The format is automatically detected based on the file extension (.yaml/.yml for YAML, .conf/.hocon for HOCON).
YAML Configuration
Create your ./config.yaml:
http:
  path: "/"
  port: 8080

projects:
  myproject:
    ref: "refs/heads/gh-pages"
    directory: "/var/www/myproject"
    command: "git pull"
    timeout: "30s"
    secret: "xxxxxxxxxxxxxxxxxxxxxxxxxx"
HOCON Configuration
Alternatively, create your ./config.conf:
http {
  path: "/"
  port: 8080
}

projects {
  myproject {
    ref: "refs/heads/gh-pages"
    directory: "/var/www/myproject"
    command: "git pull"
    timeout: "PT30S"
    secret: "xxxxxxxxxxxxxxxxxxxxxxxxxx"
  }
}
Notes:
myprojectinproject.myprojectis just a name of a project, it could be anything;refsays to only react on pushes to thegh-pagesbranch;directoryis where thecommandshould be executed;commandis to be executed — note thatgitis not installed, see below;timeoutcan be specified in humantime format (e.g., "5s", "30s") for YAML or ISO 8601 format (e.g., "PT5S", "PT30S") for HOCON;
You can then run the server:
docker run \
  -p 8080:8080 \
  -v "$(pwd)/config.yaml:/opt/app/config/config.yaml" \
  -v "/var/www:/var/www" \
  -u "$(id -u www-data):$(id -g www-data)" \
  -ti ghcr.io/alexandru/github-webhook-listener:latest
Note that we are forcing the use of www-data as the user. This is because we need permissions for /var/www that's on the host operating system. Adjust accordingly.
You can also use a docker-compose.yaml:
services:
  github-webhook-listener:
    container_name: github-webhook-listener
    image: ghcr.io/alexandru/github-webhook-listener:latest
    restart: unless-stopped
    ports:
      - "8080:8080"
    networks:
      - main
    volumes:
      - /var/www:/var/www
      - /etc/github-webhook-listener/config.yaml:/opt/app/config/config.yaml
    user: "${WWW_UID}:${WWW_GID}"

networks:
  main:
    external:
      name: main
Then to expose this server via Nginx, it's just a matter of configuring a proxy_pass:
location / {
  proxy_pass http://127.0.0.1:8080;
  proxy_set_header    Host            $host;
  proxy_set_header    X-Real-IP       $remote_addr;
  proxy_set_header    X-Forwarded-for $remote_addr;
  proxy_connect_timeout 300;
}
Configuring Your GitHub Project
Go to the settings page of your project, the "Webhooks" section, link
should be like: https://github.com/<user>/<project>/settings/hooks
Setup screen for adding a new Webhook should look like this:
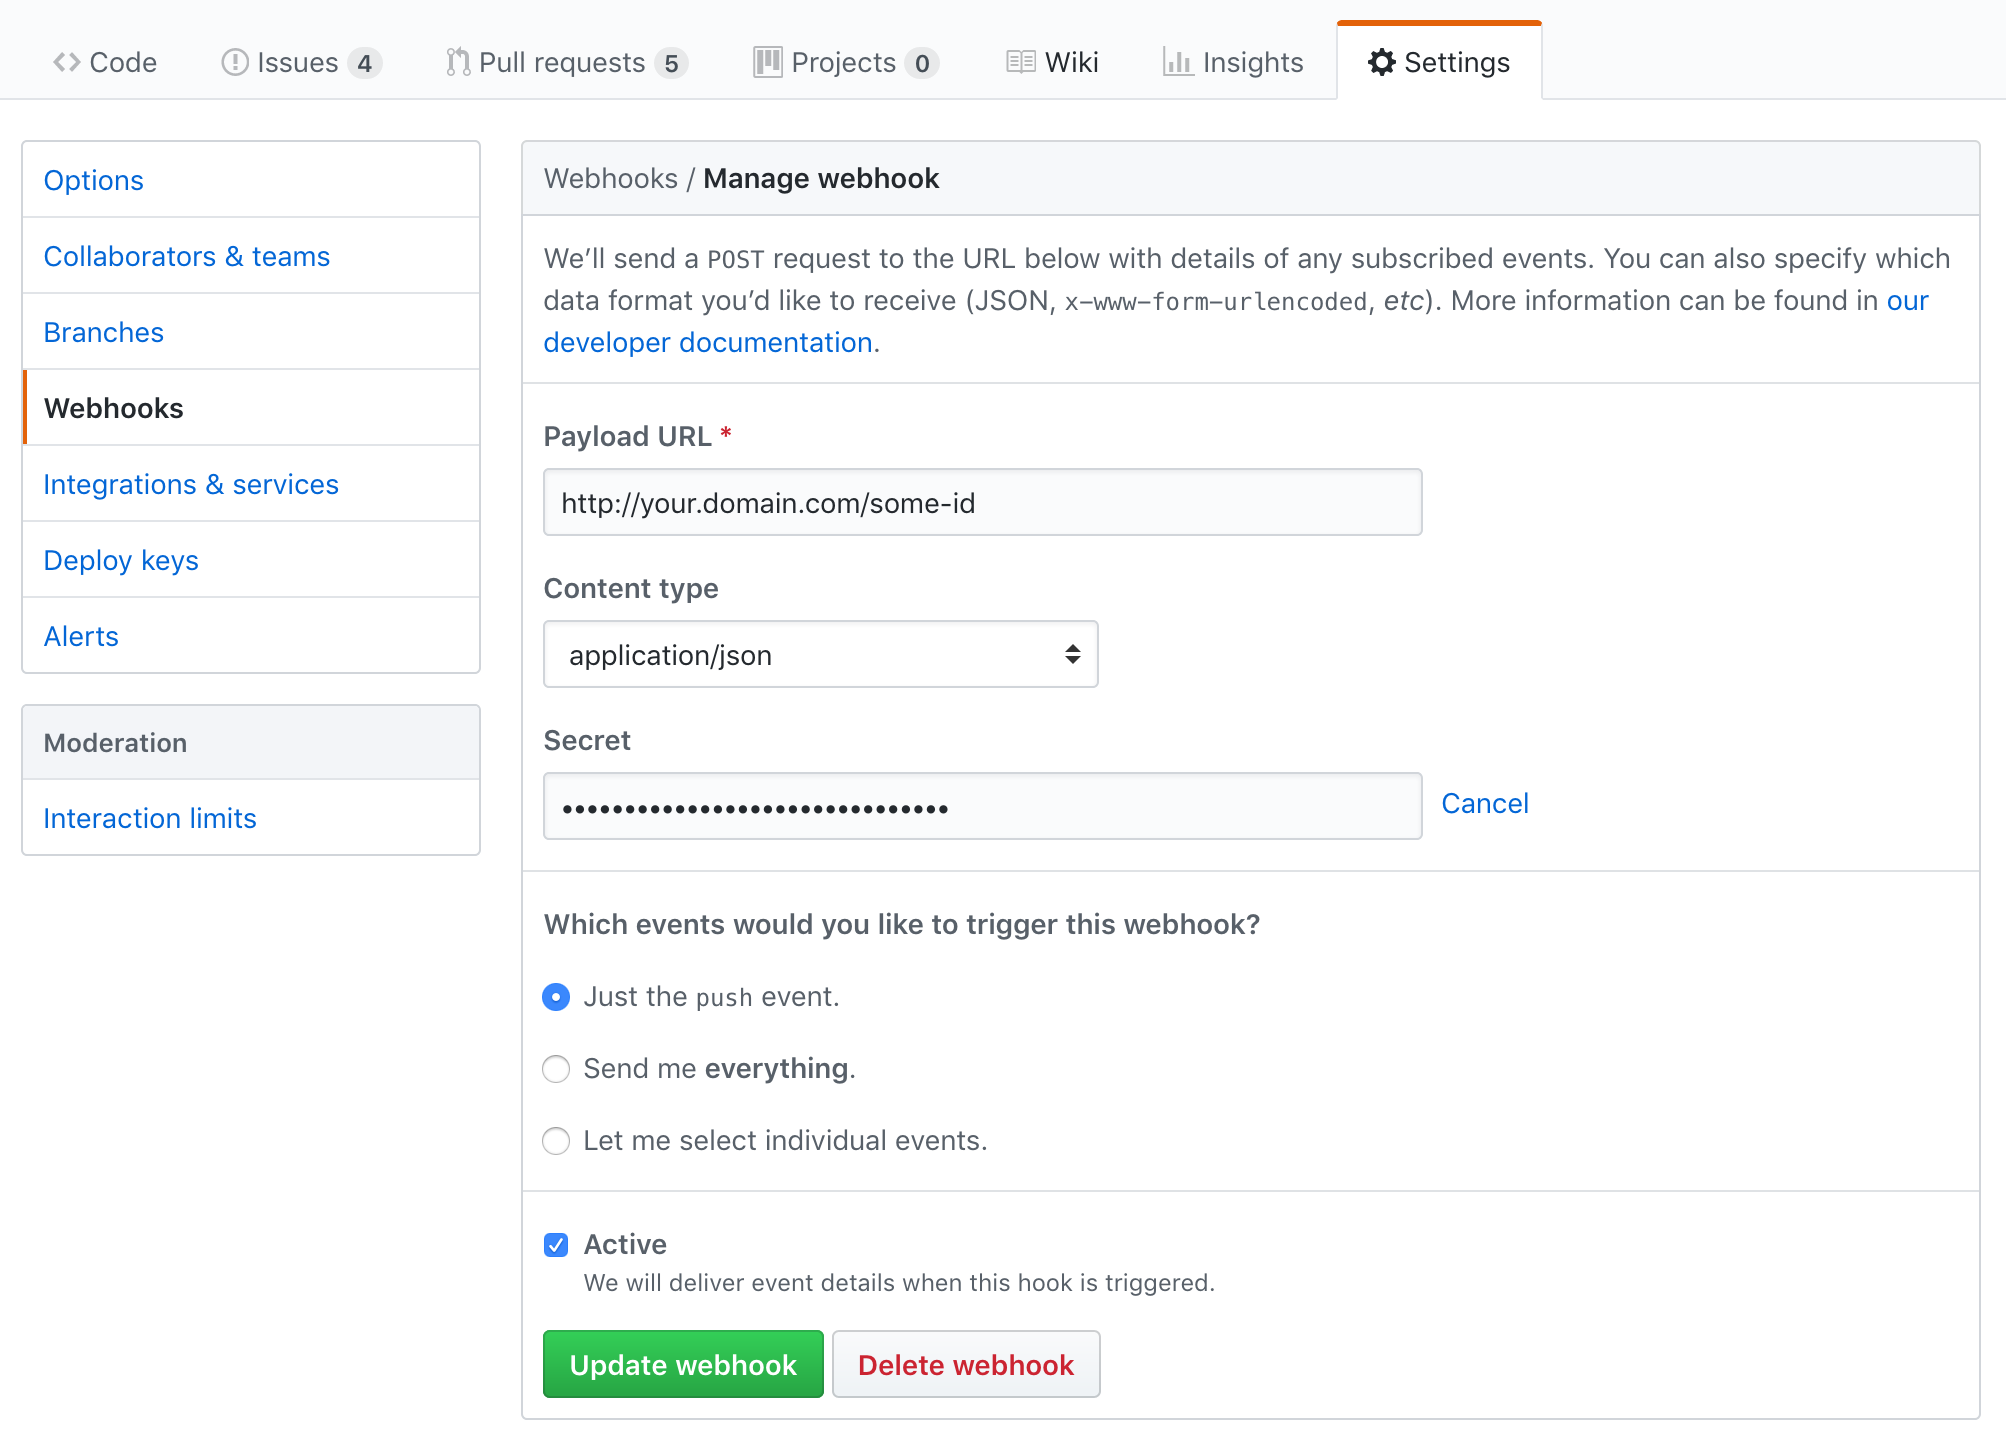
NOTEs on those fields:
- the Payload URL contains a
some-id, in the described path, that should be configured in yourconfig.yamlfile to identify your project - the Secret is the passphrase you also configured in
config.yaml— this is optional, but if theconfig.yamlmentions a passphrase which you're not mentioning in this setup, then requests will fail
Development
The project is written in Rust. To install the toolchain, which must include Cargo, see rustup.
The procedure for macOS:
brew install rustup-init

rustup-init -y
rustup install stable
rustup default stable
rustup update
rustup component add \
  clippy \
  rust-analyzer \
  rust-docs \
  rustfmt
Useful commands
Running in development mode:
cargo run -- ./config/application-dummy.yaml
Running tests:
cargo test
Building for production:
cargo build --release
The optimized binary will be located at target/release/github-webhook-listener.
Building the Docker image:
make build-docker-local
Running the Docker image:
make run-docker
License
Copyright © 2018-2025 Alexandru Nedelcu, some rights reserved.
Licensed under the AGPL-3.0 license. See LICENSE.
Core symbols most depended-on inside this repo
execute_shell_commandShape
Languages
Modules by API surface
For agents
$ claude mcp add github-webhook-listener \
  -- python -m otcore.mcp_server <graph>