github.com/ajkerrigan/visidata-plugins @vds3-0.8
Chat with this repoWhat it actually does AI analysis from the code graph — generated when you open this
README
VisiData Plugins

Custom plugins for https://github.com/saulpw/visidata/
- vds3: Open Amazon S3 paths and objects
- kvpairs: Toggle between key/value pairs and dicts
- vfake_extensions: Niche addons for vfake
- vpager: Open long cell values in the system pager
- debugging_helpers: Integrate VisiData with debugging packages
- split_navigation: Navigation keybindings for master/detail split views
- vd_jmespath: Use JMESPath expressions to add columns or toggle row selection
vds3: Open Amazon S3 paths and objects
Demo
Browse S3 with an interface like a console-based file explorer:

Use glob-matching to focus your search:

Installation
Install VisiData
Via pip:
pip3 install visidata
There is a comprehensive guide to various installation methods here. I prefer using pipx for the main install, and pipx inject to add plugin dependencies. Choose whichever install method works best for you, as long as you install VisiData 2.0 or higher.
Install the Plugin
This plugin can be installed using VisiData's built-in plugin framework, or manually.
Using the Plugin Framework (Recommended)
- Start VisiData.
vd
-
Hit
<Space>, typeopen-pluginsand hit<Enter>to open the plugins sheet. -
Scroll to the
vds3plugin and hitato add it. -
Wait for installation to complete, then exit VisiData.
-
Be sure that your
~/.visidatarcfile contains the line:
import plugins
- Restart VisiData.
Manually
- Install s3fs:
pip3 install s3fs
- Copy
vds3.pyto apluginssubdirectory inside your VisiData directory (by default,~/.visidata):
mkdir -p ~/.visidata/plugins
cd path/to/visidata-plugins
cp plugins/vds3.py ~/.visidata/plugins
- Add this line to your
~/.visidatarcfile:
import plugins.vds3
Usage
Because this plugin builds on top of s3fs and boto3, it takes advantage of standard AWS CLI configuration settings.
Be sure that the AWS CLI is installed and configured to point to your desired AWS account.
Open a file stored in S3
vd 's3://my-bucket/path/to/file.json.gz'
List all buckets
vd 's3://'
Browse a bucket's contents
vd 's3://my-bucket'
vd 's3://my-bucket/path'
When browsing a bucket, VisiData will behave like a file explorer:
Enter: Opens the current file or directory as a new sheet.
g+Enter: Open all selected files and directories.
q's behavior is unchanged (closes the current sheet), but while browsing a bucket it effectively becomes the "go up one level" command.
Browse all CSV files in a bucket (glob matching)
vd 's3://my-bucket/**/*.csv.gz
Since glob-matching can return results from multiple "directories" (S3 prefixes), the glob results sheet will display full object names rather than imitating a navigable directory hierarchy.
Browse previous versions of objects
Open an S3 path:
vd 's3://my-bucket'
vd 's3://my-bucket/path'
Hit ^V to toggle support for S3 versioning. When enabled, there will be an additional Latest? column along with a Version ID column that is hidden by default. Previous versions can be opened with Enter or g+Enter as usual.
Join/combine objects
From an S3 directory listings, select multiple objects and use & to join object contents into a single sheet. This uses the native VisiData join functionality under the hood, so the available join types match those described in VisiData's join documentation.
Configuration
This plugin's behavior can be tweaked with the following options:
vds3_glob (Default: True): Enable glob matching for S3 paths. Glob-matching will only kick in for path names which contain glob patterns (*, ?, [ or ]). However, it's possible to have S3 keys which contain those characters. In those cases, set this to False to explicitly disable glob-matching.
vds3_endpoint (Default: None): Specify a custom S3 endpoint. This can be useful for local testing, or for pairing this plugin with S3-compatible endpoints such as MinIO, Backblaze B2, etc.
Note: This sample ~/.visidatarc snippet defines local S3 endpoints to be used when specific AWS profiles are active. It assumes that if the moto or localstack AWS CLI profiles are active, you have a local moto server or localstack S3 service running on a specific port. For any other AWS profile it falls back to the AWS default endpoint. A block like this can help you naturally switch between endpoints based on context, rather than requiring command line switches.
profile_endpoint_map = {
    'localstack': 'http://localhost:4572',
    'moto': 'http://localhost:3000',
}
options.vds3_endpoint = profile_endpoint_map.get(os.environ.get('AWS_PROFILE'))
Options can be configured directly in a ~/.visidatarc file:
options.vds3_glob = False
Or specified at runtime:
vd --vds3-glob false 's3://my-bucket/file[?].json'
VisiData also supports changing options from the Options sheet inside the application. Jeremy Singer-Vine's tutorial is a helpful reference for that.
Status
This plugin is in a "minimally viable" state - focused on basic S3 read operations. Reading directly from S3 into pandas/dask dataframes is not currently supported, nor is writing to S3.
kvpairs: Toggle values between lists of Key/Value pairs and dicts
Overview
This plugin adds a pair of column-level convenience functions (from_entries and to_entries), which are similar to their jq counterparts. As of this writing, they're most useful for helping to break out tags from AWS API responses. For that specific case, this custom keybinding is a handy shortcut that composes with VisiData's existing "expand column" logic:
Sheet.addCommand(
    "gz{",
    "expand-tags",
    "expand_cols_deep(sheet, [sheet.colsByName['Tags'].from_entries()], cursorRow)"
)
In that scenario, assume we have a Tags column whose data looks like this:
[
    {"Key": "Environment", "Value": "production"},
    {"Key": "Name", "Value": "my-project"}
]
from_entries() turns that into this:
{
    "Environment": "production",
    "Name": "my-project"
}
And VisiData's expand_cols_deep() function (bound by default to () breaks that into Tags.Environment and Tags.Name columns, so each tag becomes a first-class VisiData column.
Installation
The kvpairs plugin is not currently included in VisiData's plugin framework. It can be installed manually by copying kvpairs.py to your local ~/.visidata/plugins directory and including import plugins.kvpairs in your ~/.visidatarc file.
vfake_extensions: Niche addons for vfake
Overview
VisiData's vfake plugin provides interactive access to some common Faker functionality. The extra bits in vfake_extensions are some personal customizations. They skew heavily toward AWS and are probably most useful as a reference/inspiration for other vfake customizations.
Installation
This plugin won't be included in VisiData, and probably shouldn't be added manually as-is either. If you find any pieces of vfake_extensions.py useful, transplant them into your own ~/.visidatarc file or personal plugin collection inside ~/.visidata/plugins.
Usage
VdCustomProvider could be a helpful reference if you have a need to define your own custom Faker generator functions for use with vfake.
The autofake functionality can save a lot of time if you repeatedly generate fake data for values that follow predictable patterns.
Autofake Demo

vpager: Open long cell values in the system pager
Overview
For cells that contain long strings, it can sometimes be easier to pass the value into an external viewer rather than relying on VisiData's line wrapping. This plugin lets z^O open a cell value in the system pager (the value of the PAGER environment variable, or less by default).
Installation
- Option 1: Include the contents of vpager.py in your
~/.visidatarcfile. - Option 2:
- Copy vpager.py to your local
~/.visidata/pluginsdirectory. - Add
import plugins.vpagerto~/.visidata/plugins/__init__.py - Add
import pluginsto~/.visidatarcif it is not there already
Usage
Navigate to a cell with a long value and hit z^O (z, Ctrl-o) to open it with the default system pager. To open with a different program, update your PAGER environment variable.
debugging_helpers: Integrate VisiData with debugging packages
Overview
VisiData is a multi-threaded curses application, which can trip up some traditional console-based debugging tools. For example, vanilla pdb is a terrible fit for VisiData - the output is all over the place.
This plugin adds a --debugger option, initially supporting the following debuggers:
Since the latter two wrap pdb, they will automatically use pdb++ if it's installed.
Workflow
Install a supported debugger via pip, then run VisiData with the --debugger option:
vd --debugger pudb sample_data/benchmark.csv
VisiData should immediately trigger a breakpoint. The behavior here varies by debugger:
- PuDB: Takes over your screen immediately
- remote-pdb: Awaits a connection (
telnet 127.0.0.1 4444ornc 127.0.0.1 4444from another pane/window) - web-pdb: Awaits a web connection (browse to http://localhost:5555)
Once the debugger is active, you can start poking around right away or continue execution with c. At that point, the debugger will set up an event handler for the interrupt signal. This plugin binds z^C (z, Ctrl-C) as an interrupt keybinding, so that becomes your interactive "break on demand" shortcut.
Notes
- I had issues with several of PuDB's shell options (ptpython, ptipython, bpython). I had more success setting up a modified bpython shell as a PuDB custom shell.
- PuDB works great as a full-screen debugger, but debugging from a separate terminal is also handy if you need to see the debugger without hiding the VisiData screen. VisiData and PuDB in separate panes of the same tmux window is a nice setup.
- Even with some careful debugger choices and configuration, VisiData and the debugger can sometimes draw over each other. When that happens, VisiData's
^Lbinding to redraw the screen is helpful. - Despite all the links and notes here, I mostly debug with the VS Code Python extension which makes this plugin completely useless! 😃
Demo

split_navigation: Navigation keybindings for master/detail split views
Overview
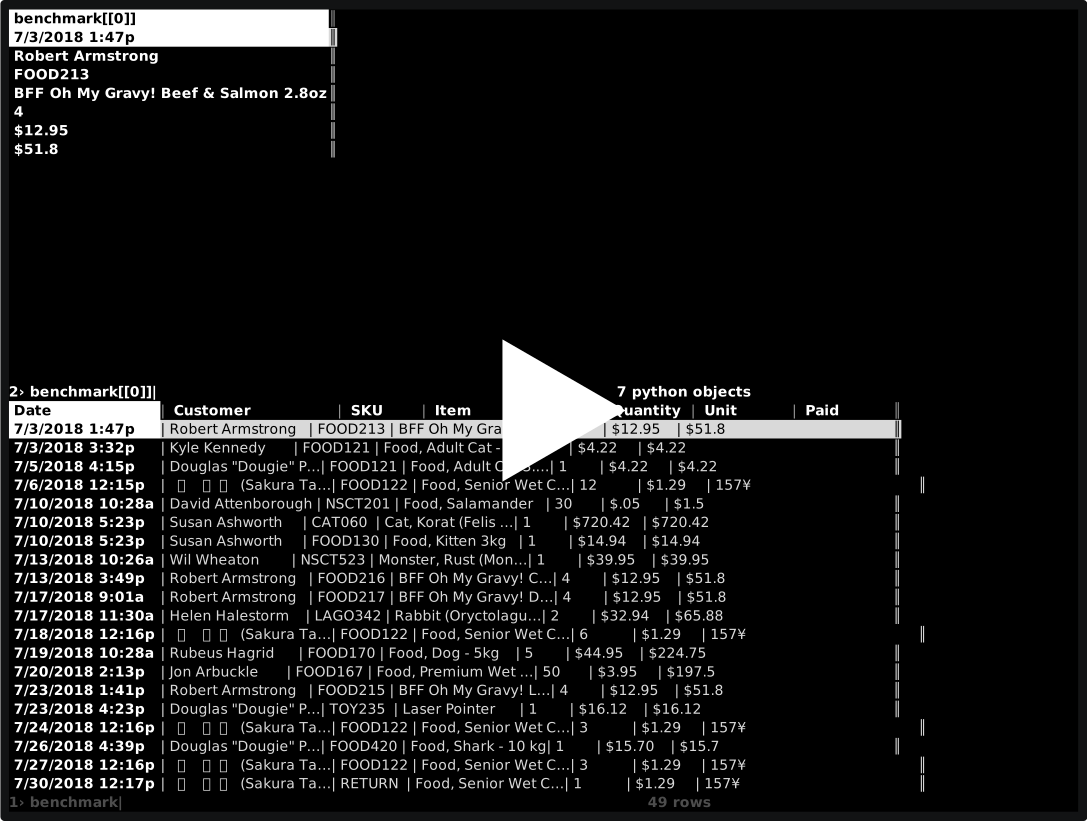
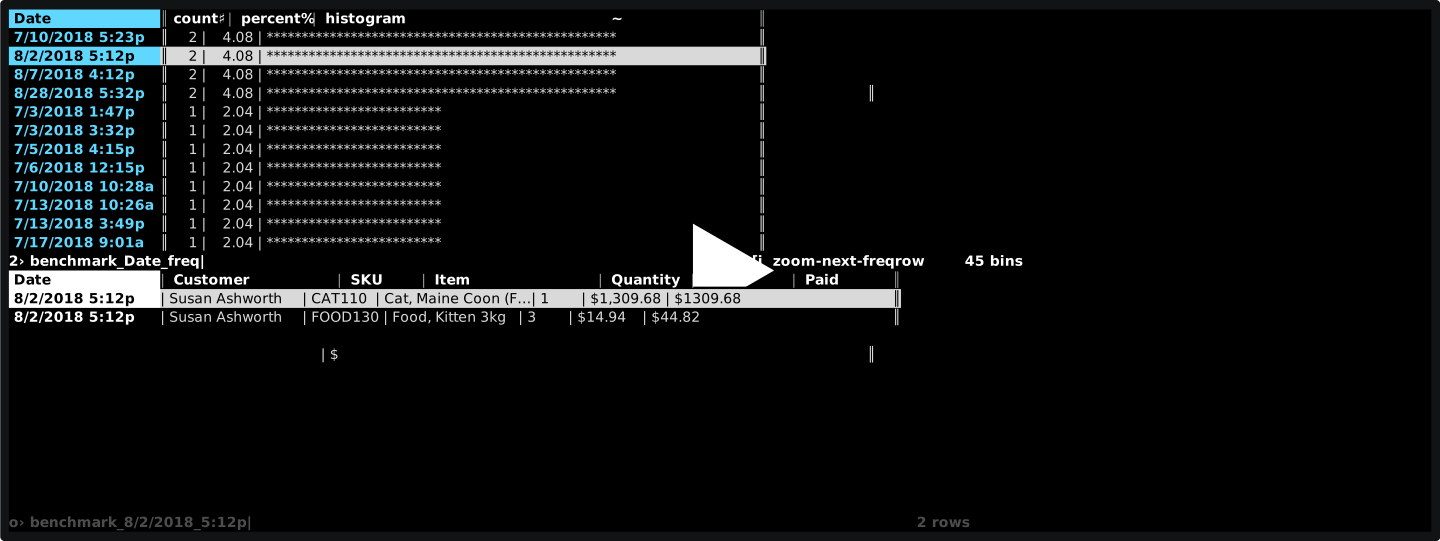
VisiData's split window feature enables interesting use cases like displaying a data set and frequency table simultaneously, or a master list of records and a child view of details. In that second case, it can be useful to keep focus in the child/detail view while navigating up and down in the parent view. This little plugin sets up keybindings for that.
Demos
Master/Detail Split Navigation
Frequency Table "Zoom" Navigation
vd_jmespath: Evaluate JMESPath expressions
Overview
JMESPath is a query language for JSON data. This plugin adds VisiData commands to add columns or select rows based on JMESPath expressions.
Installation
- Option 1: Include the contents of vd_jmespath.py in your
~/.visidatarcfile. - Option 2:
- Copy vd_jmespath.py to your local
~/.visidata/pluginsdir
Core symbols most depended-on inside this repo
matchShape
Languages
Modules by API surface
For agents
$ claude mcp add visidata-plugins \
  -- python -m otcore.mcp_server <graph>