github.com/AllentDan/LibtorchSegmentation @main
Chat with this repoBrowse by type
What it actually does AI analysis from the code graph — generated when you open this
README
English | 中文

基于LibTorch的C++开源图像分割神经网络库.
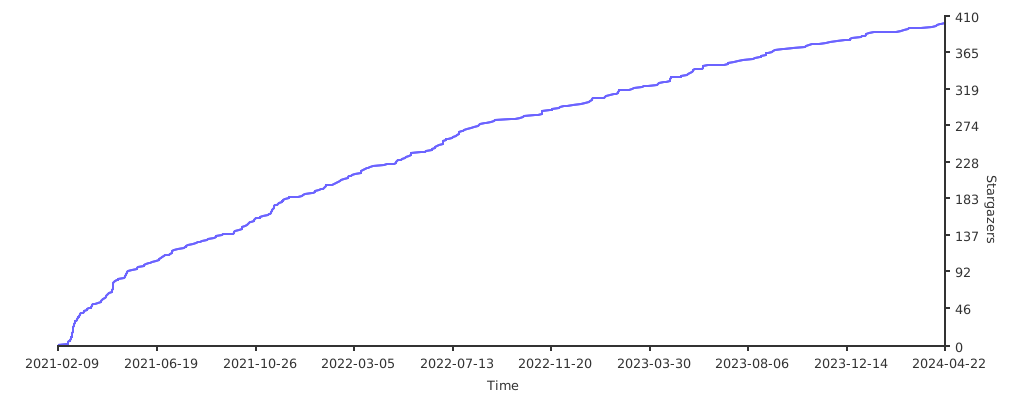
⭐如果有用请给我一个star⭐
这个库具有以下优点:
- 高级的API (只需一行代码就可创建网络)
- 7 种模型架构可用于单类或者多类的分割任务 (包括Unet)
- 15 种编码器网络
- 所有的编码器都有预训练权重,可以更快更好地收敛
- 相比于python下的GPU前向推理速度具有30%或以上的提速, cpu下保持速度一致. (Unet测试于RTX 2070S).
📚 Libtorch教程 📚
如果你想对该开源项目有更多更详细的了解,请前往本人另一个开源项目:Libtorch教程 .
📋 目录
⏳ 快速开始
1. 用 Libtorch Segment 创建你的第一个分割网络
这是一个resnet34的torchscript模型,可以作为骨干网络权重。分割模型是 LibTorch 的 torch::nn::Module的派生类, 可以很容易生成:
#include "Segmentor.h"
auto model = UNet(1, /*num of classes*/
                  "resnet34", /*encoder name, could be resnet50 or others*/
                  "path to resnet34.pt"/*weight path pretrained on ImageNet, it is produced by torchscript*/
                  );
2. 生成自己的预训练权重
所有编码器均具有预训练的权重。加载预训练权重,以相同的方式训练数据,可能会获得更好的结果(更高的指标得分和更快的收敛速度)。还可以在冻结主干的同时仅训练解码器和分割头。
import torch
from torchvision import models

# resnet50 for example
model = models.resnet50(pretrained=True)
model.eval()
var=torch.ones((1,3,224,224))
traced_script_module = torch.jit.trace(model, var)
traced_script_module.save("resnet50.pt")
恭喜你! 大功告成! 现在,您可以使用自己喜欢的主干和分割框架来训练模型了。
💡 例子
- 使用来自PASCAL VOC数据集的图像进行人体分割数据训练模型. "voc_person_seg" 目录包含32个json标签及其相应的jpeg图像用于训练,还有8个json标签以及相应的图像用于验证。
Segmentor<FPN> segmentor;
segmentor.Initialize(0/*gpu id, -1 for cpu*/,
                    512/*resize width*/,
                    512/*resize height*/,
                    {"background","person"}/*class name dict, background included*/,
                    "resnet34"/*backbone name*/,
                    "your path to resnet34.pt");
segmentor.Train(0.0003/*initial leaning rate*/,
                300/*training epochs*/,
                4/*batch size*/,
                "your path to voc_person_seg",
                ".jpg"/*image type*/,
                "your path to save segmentor.pt");
- 预测测试。项目中提供了以ResNet34为骨干网络的FPN网络,训练了一些周期得到segmentor.pt文件在这。 您可以直接测试分割结果:
cv::Mat image = cv::imread("your path to voc_person_seg\\val\\2007_004000.jpg");
Segmentor<FPN> segmentor;
segmentor.Initialize(0,512,512,{"background","person"},
                      "resnet34","your path to resnet34.pt");
segmentor.LoadWeight("segmentor.pt"/*the saved .pt path*/);
segmentor.Predict(image,"person"/*class name for showing*/);
预测结果显示如下:

🧑🚀 训练自己的数据
- 创建自己的数据集. 使用"pip install"安装labelme并标注你的图像. 将输出的json文件和图像分成以下文件夹:
Dataset
├── train
│   ├── xxx.json
│   ├── xxx.jpg
│   └......
├── val
│   ├── xxxx.json
│   ├── xxxx.jpg
│   └......
- 训练或测试。就像“ voc_person_seg”的示例一样,用自己的数据集路径替换“ voc_person_seg”。
- 记得使用训练技巧以提高模型的训练效果。
📦 Models
Architectures
- [x] Unet [paper]
- [x] FPN [paper]
- [x] PAN [paper]
- [x] PSPNet [paper]
- [x] LinkNet [paper]
- [x] DeepLabV3 [paper]
- [x] DeepLabV3+ [paper]
Encoders
- [x] ResNet
- [x] ResNext
- [x] VGG
以下是该项目中受支持的编码器的列表。除resnest外,所有编码器权重都可以通过torchvision生成。选择适当的编码器,然后单击以展开表格,然后选择特定的编码器及其预训练的权重。
ResNet
| Encoder | Weights | Params, M |
|---|---|---|
| resnet18 | imagenet | 11M |
| resnet34 | imagenet | 21M |
| resnet50 | imagenet | 23M |
| resnet101 | imagenet | 42M |
| resnet152 | imagenet | 58M |
ResNeXt
| Encoder | Weights | Params, M |
|---|---|---|
| resnext50_32x4d | imagenet | 22M |
| resnext101_32x8d | imagenet | 86M |
ResNeSt
| Encoder | Weights | Params, M |
|---|---|---|
| timm-resnest14d | imagenet | 8M |
| timm-resnest26d | imagenet | 15M |
| timm-resnest50d | imagenet | 25M |
| timm-resnest101e | imagenet | 46M |
| timm-resnest200e | imagenet | 68M |
| timm-resnest269e | imagenet | 108M |
| timm-resnest50d_4s2x40d | imagenet | 28M |
| timm-resnest50d_1s4x24d | imagenet | 23M |
SE-Net
| Encoder | Weights | Params, M |
|---|---|---|
| senet154 | imagenet | 113M |
| se_resnet50 | imagenet | 26M |
| se_resnet101 | imagenet | 47M |
| se_resnet152 | imagenet | 64M |
| se_resnext50_32x4d | imagenet | 25M |
| se_resnext101_32x4d | imagenet | 46M |
VGG
| Encoder | Weights | Params, M |
|---|---|---|
| vgg11 | imagenet | 9M |
| vgg11_bn | imagenet | 9M |
| vgg13 | imagenet | 9M |
| vgg13_bn | imagenet | 9M |
| vgg16 | imagenet | 14M |
| vgg16_bn | imagenet | 14M |
| vgg19 | imagenet | 20M |
| vgg19_bn | imagenet | 20M |
🛠 安装
依赖库:
Windows:
配置libtorch 开发环境. Visual studio 和 Qt Creator已经通过libtorch1.7x release的验证.
Linux && MacOS:
安装libtorch和opencv。 对于libtorch, 按照官方教程安装。 对于opencv, 按照官方安装步骤。
如果你都配置好了他们,恭喜!!! 下载一个resnet34的预训练权重,点击下载和一个示例.pt文件,点击下载,放入weights文件夹。
更改src/main.cpp中的图片路径预训练权重和加载的segmentor权重路径。随后,build路径在终端输入:
export Torch_DIR='/path/to/libtorch'
cd build
cmake ..
make
./LibtorchSegmentation
⏳ ToDo
- [ ] 更多的骨干网络和分割框架
- [ ] UNet++ [paper]
- [ ] ResNest
- [ ] Se-Net
- [ ] ...
- [x] 数据增强
- [x] 随机水平翻转
- [x] 随机垂直翻转
- [x] 随机缩放和旋转
- [ ] ...
- [x] 训练技巧
- [x] 联合损失:dice和交叉熵
- [x] 冻结骨干网络
- [x] 学习率衰减策略
- [ ] ...
🤝 感谢
以下是目前给予帮助的项目. - official pytorch - qubvel SMP - wkentaro labelme - nlohmann json
📝 引用
@misc{Chunyu:2021,
  Author = {Chunyu Dong},
  Title = {Libtorch Segment},
  Year = {2021},
  Publisher = {GitHub},
  Journal = {GitHub repository},
  Howpublished = {\url{https://github.com/AllentDan/SegmentationCpp}}
}
🛡️ 证书
该项目以 MIT License开源,
相关项目
基于libtorch,我释放了如下开源项目: - LibtorchTutorials - LibtorchSegmentation - LibtorchDetection
别忘了点赞哟
Core symbols most depended-on inside this repo
Shape
Languages
Modules by API surface
For agents
$ claude mcp add LibtorchSegmentation \
  -- python -m otcore.mcp_server <graph>